User Guide
Introduction
IntelliJournal is a desktop app for managing journals as well as contacts, optimised for use via a Command Line Interface (CLI) while still having the benefits of a Graphical User Interface (GUI). Made for business people, if you can type fast, IntelliJournal can help you record down the details of your business meetings as journal entries with your business contacts as well as location information faster than traditional GUI apps.
Quick start
-
Ensure you have Java
11or above installed in your Computer. -
Download the latest
intellijournal.jarfrom here. -
Copy the file to the folder you want to use as the home folder for your IntelliJournal.
-
Double-click the file to start the app.
-
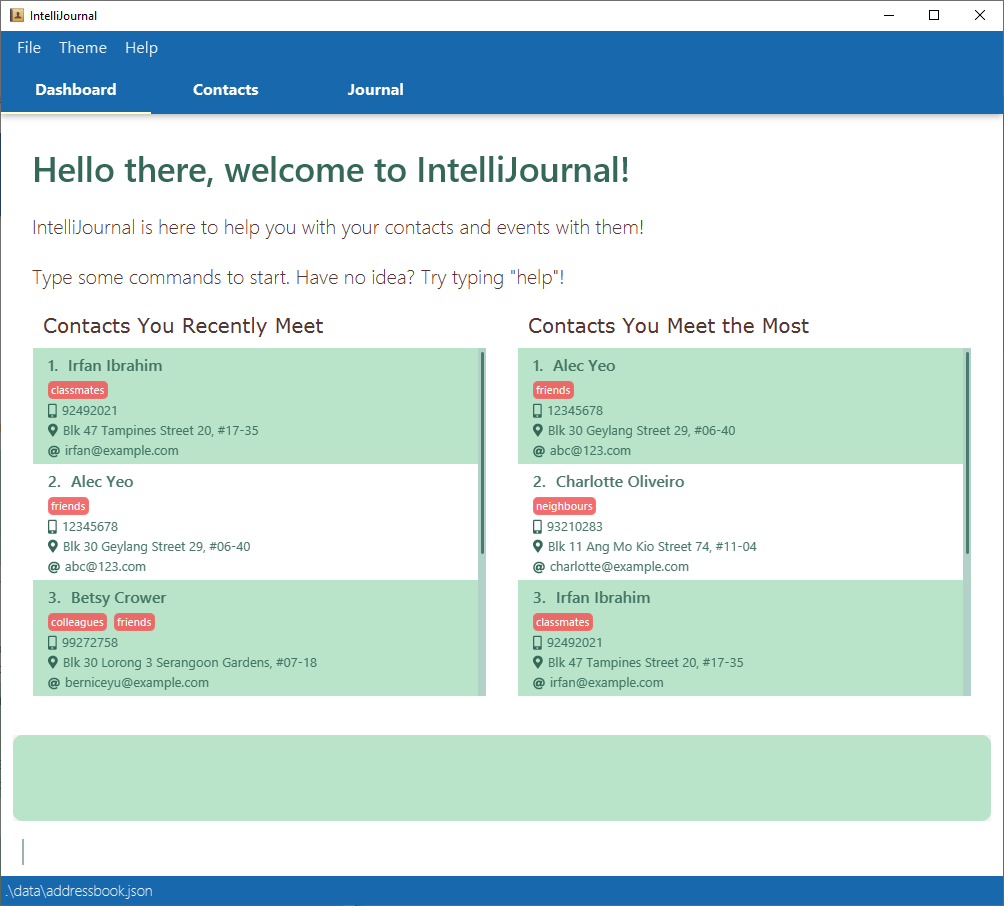
The GUI similar to the below should appear in a few seconds. The app will start with the dashboard tab, which shows you the list of recent contacts and the list of frequent contacts.
-
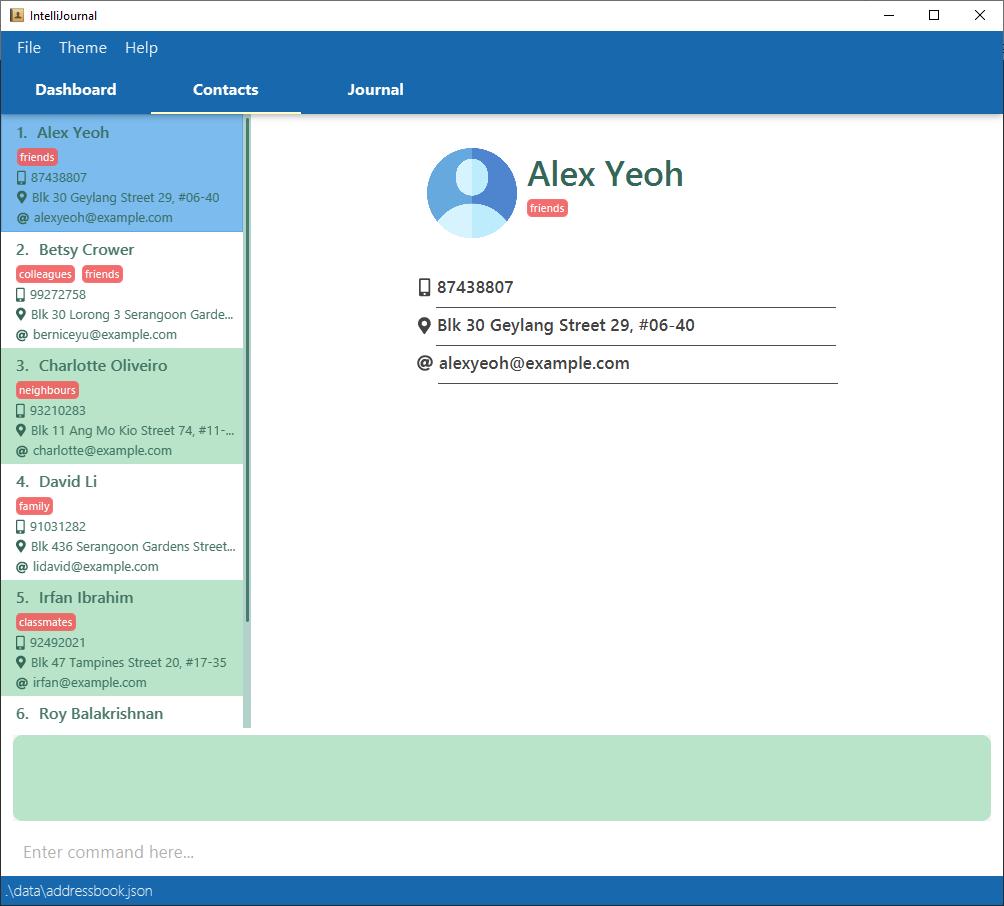
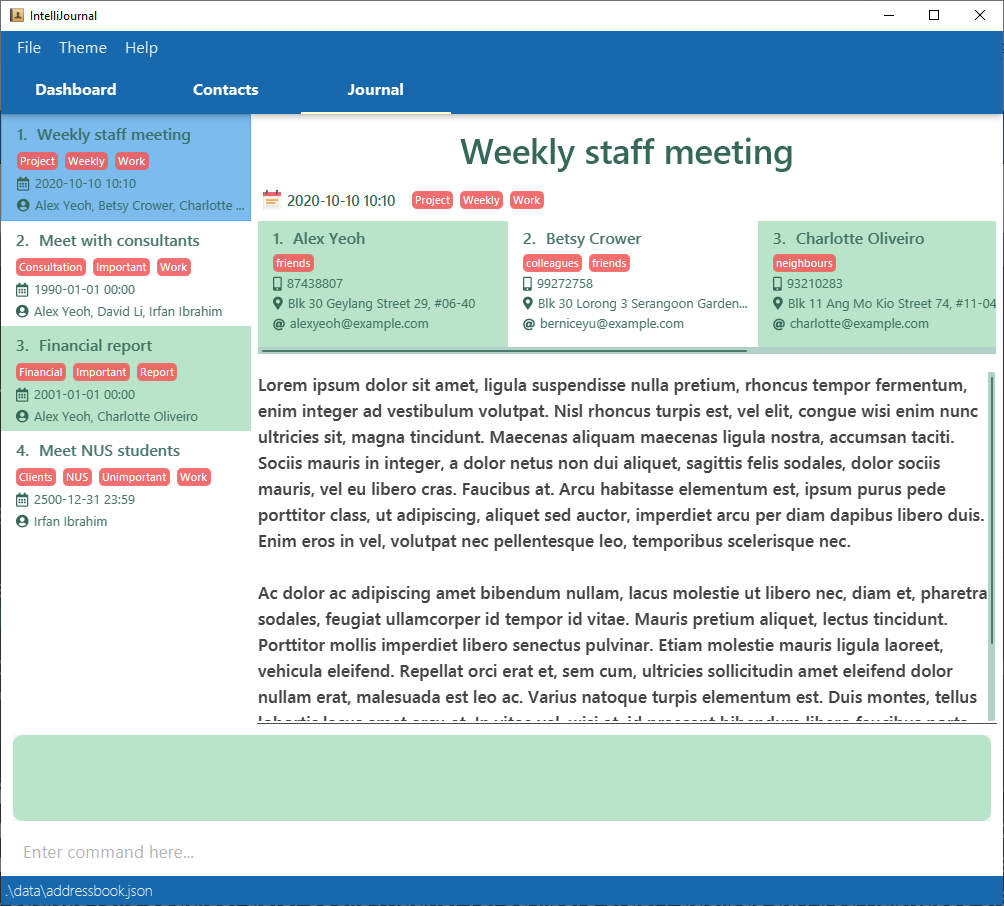
You can also navigate to the other two tabs, which will look like the second and third screenshots below. There will be sample contacts and journal entries on your initial start-up of the app.
-
Type the command in the command box and press Enter to execute it. e.g. typing
helpand pressing Enter will open the help window.Some example commands you can try:
-
listc: Lists all contacts. -
addc n/John Doe p/98765432 e/johnd@example.com a/John street, block
123, #01-01
:
Adds a contact namedJohn Doeto the Address Book. -
deletec 3: deletes the 3rd contact shown in the current list. -
clearc: Clear all sample contacts. -
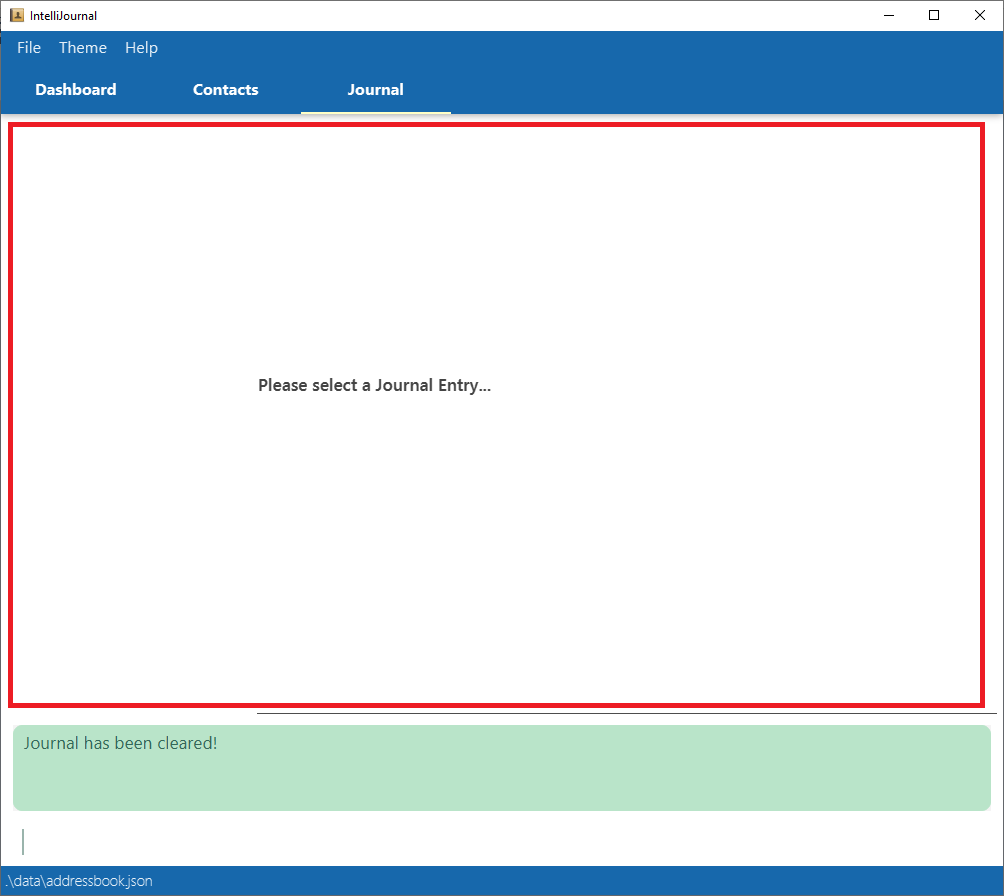
clearj: Clear all sample journal entries. -
exit: Exits the app.
-
-
Refer to the Features below for details of each command.
Features
The features section will be split up according to the 3 types of features in IntelliJournal:
- Contacts - features involving your address book contacts
- Journal Entries - features involving your journal entries
- Miscellaneous - all other features
![]() Notes about the command format:
Notes about the command format:
-
Words in
UPPER_CASEare the parameters to be supplied by the user.
e.g. inaddcontact n/NAME,NAMEis a parameter which can be used asadd n/John Doe. -
Items in square brackets are optional.
e.gn/NAME [t/TAG]can be used asn/John Doe t/friendor asn/John Doe. -
Items with
…after them can be used multiple times including zero times.
e.g.[t/TAG]…can be used as ` ` (i.e. 0 times),t/friend,t/friend t/familyetc. -
If multiple items without
…after them are supplied by the user, the last item is used.
e.g.n/NAME p/PHONE_NUMBERif used asn/John Doe n/Betsy Crowe p/91111111 p/99988877,Betsy Croweand99988877will be the name and phone numbers used. -
Parameters can be in any order.
e.g. if the command specifiesn/NAME p/PHONE_NUMBER,p/PHONE_NUMBER n/NAMEis also acceptable.
Contacts
Adding a contact: addcontact
Adds a contact to the address book, after adding the contact, the app will show the
Contacts tab, and the sidebar will scroll to the new contact you just added,
displaying contact information on the right.
Aliases: addcontact, addc
Format: addcontact n/NAME [p/PHONE_NUMBER] [e/EMAIL] [a/ADDRESS] [t/TAG]…
![]() Tips:
Tips:
- A contact can have any number of tags (including 0).
-
NAMEmust not be a name that is already used in the address book, even if it has different case letters. -
TAGmust be alphanumeric, without spaces. -
PHONE_NUMBERmust be a valid Singaporean number, 8 digits long and starting with either 6, 8, or 9. - The country code +65 is also accepted at the start of
PHONE_NUMBER.
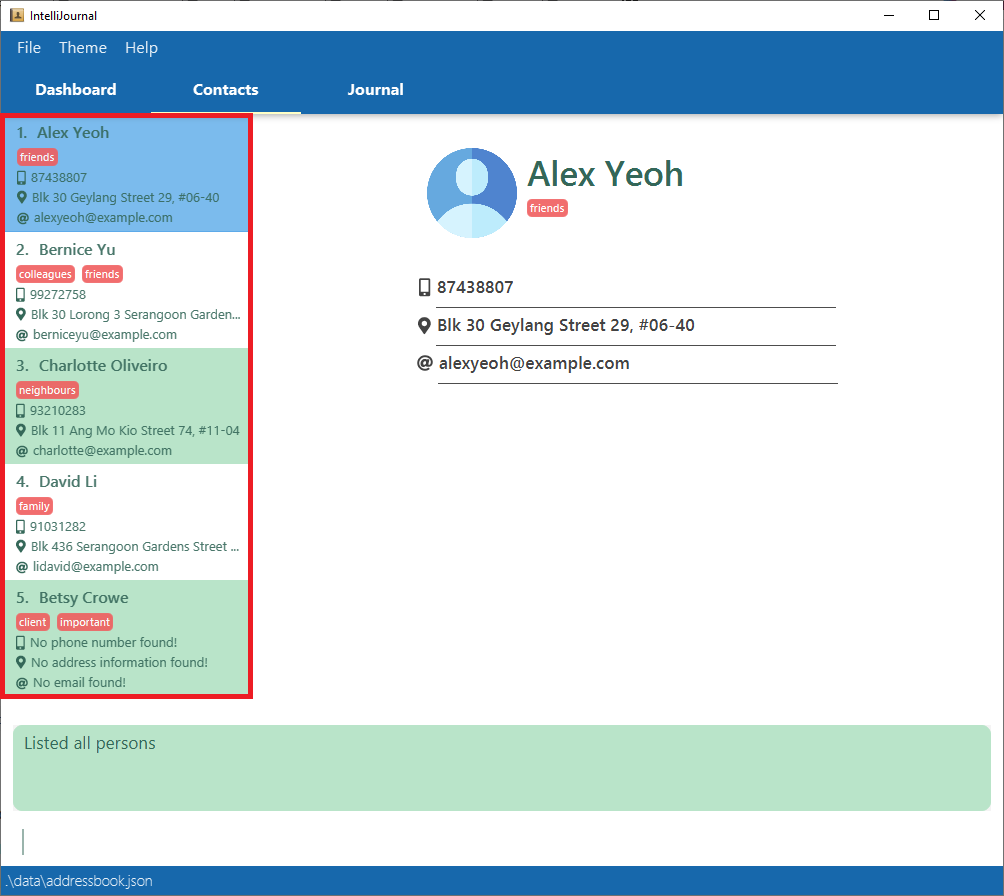
Example:
-
Type
addcontact n/Betsy Crowe t/client t/importantinto the command box and press enter.
-
This adds a contact with the name of
Betsy Croweand tags ofclientandimportant.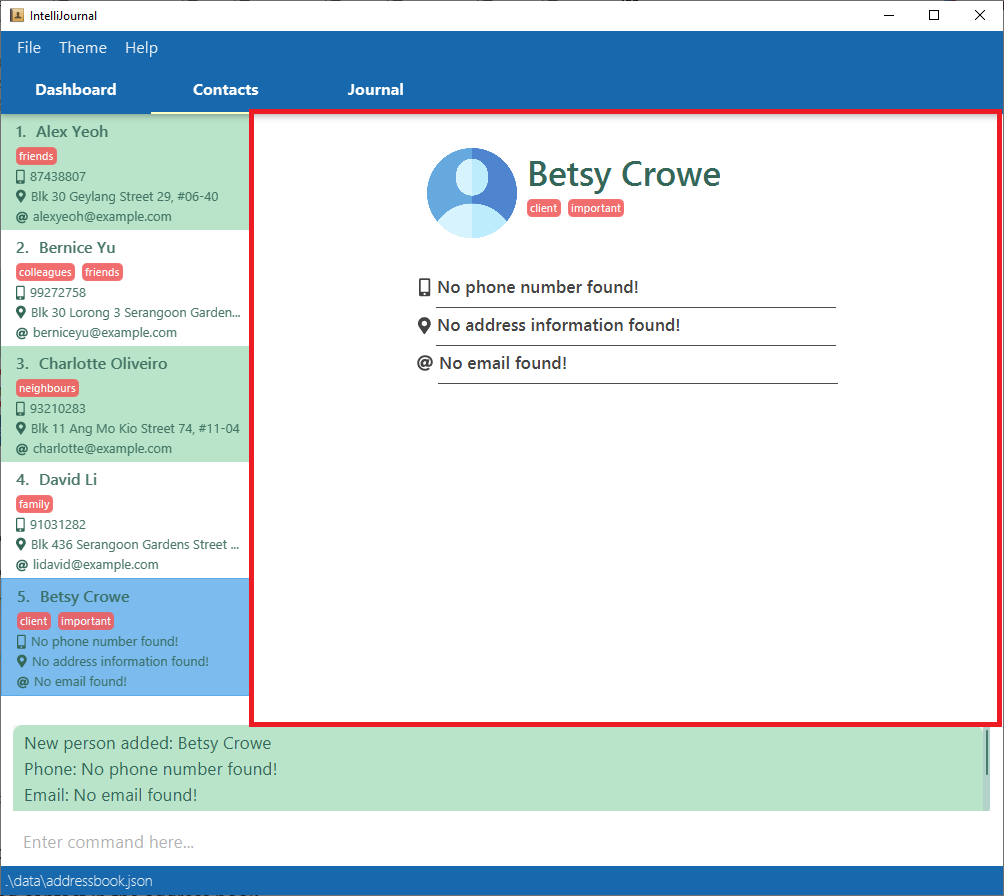
Listing all contacts: listc
Lists all the contacts in the address book.
Aliases: listc, lc
Format: listc
Example:
-
Type
listcinto the command box and press enter.
-
You will be directed to the address book tab, with all the contacts listed on the sidebar.
Editing a contact: editc
Edits an existing contact in the address book.
Aliases: editc, edc
Format: editc INDEX [n/NAME] [p/PHONE_NUMBER] [e/EMAIL] [a/ADDRESS] [t/TAG]…
![]() Tips:
Tips:
- Edits the contact at the specified
INDEX. The index refers to the index number shown in the displayed contact list. -
NAMEmust not be a name that is already used in the address book, even if it has different case letters. - At least one of the optional fields must be provided.
- Existing values will be updated to the input values.
-
TAGmust be alphanumeric, without spaces. -
PHONE_NUMBERmust be a valid Singaporean number, 8 digits long and starting with either 6, 8, or 9. - The country code +65 is also accepted at the start of
PHONE_NUMBER. - When editing tags, the existing tags of the contact will be removed i.e adding of tags is not cumulative.
- You can remove all the contact’s tags by typing t/ without specifying any tags after it.
- After editing a contact, the list displayed in the
Contactstab will be reset to show all existing contacts, because the previous filtering operation may not still have the same effects on the edited contact.
Example:
-
Type
editc 2 n/Betsy Crowe t/ e/betsycrowe@example.cominto the command box and press enter.
-
This edits the name and email of the 2nd contact to
Betsy Croweandbetsycrowe@example.comrespectively, while removing all tags.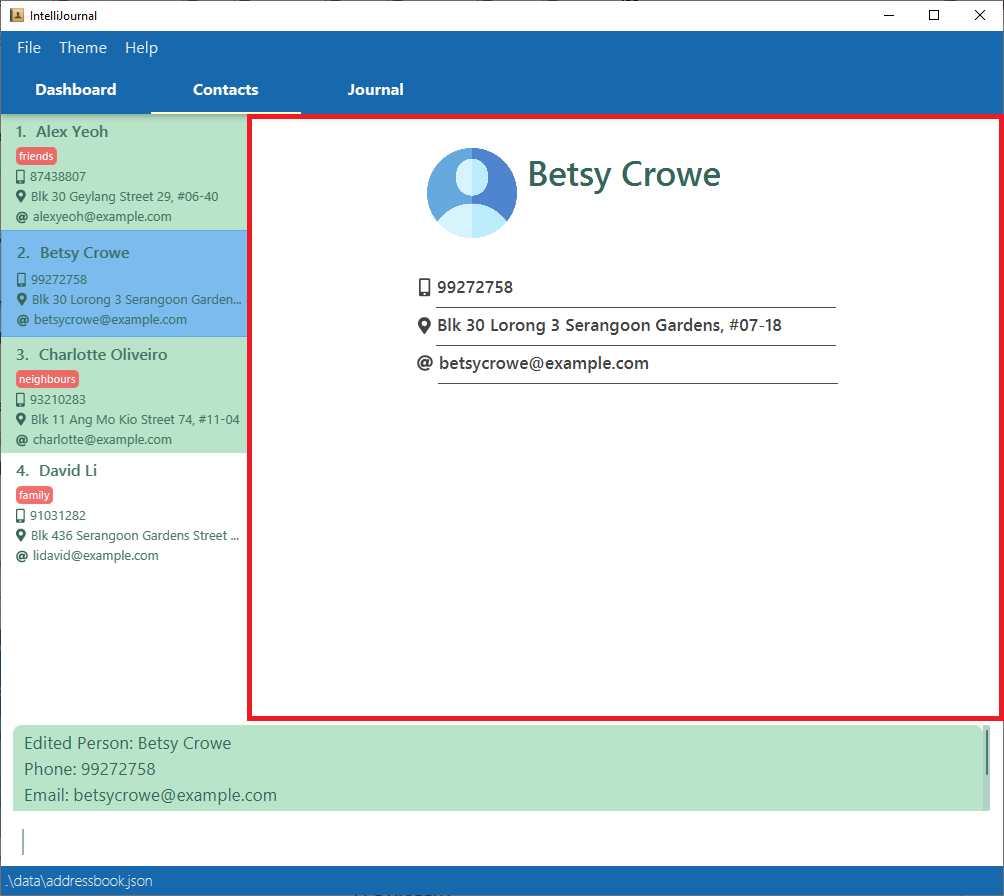
Viewing a contact: viewc
Opens up a contact in the current displayed list to show further details.
Aliases: viewc, vc
Format: viewc INDEX
- If you type a
viewccommand when IntelliJournal displaysContacttab, IntelliJournal will select the contact at the specified index and display its details on the right. - If a
viewccommand is executed when IntelliJournal displays another tab (i.e.Journaltab orDashboardtab), IntelliJournal will automatically navigate to theContacttab, select the contact at the specified index, and display its details on the right.
![]() Tips:
Tips:
-
INDEXrefers to the index number of the contact in the current displayed list, instead of the index number of the contact in the full unfiltered list, which, for example, may have been filtered using afindccommand. More details about a filtered contact list can be found under the Finding contacts:findcsection. -
INDEXmust be a positive integer, which does not exceed the number of contacts in the current displayed list.
Example:
-
Open the
Contactstab, IntelliJournal should display a list of contacts on the left with detailed content on the right. If no contact has been selected to display, IntelliJournal will automatically select the first contact to show its details.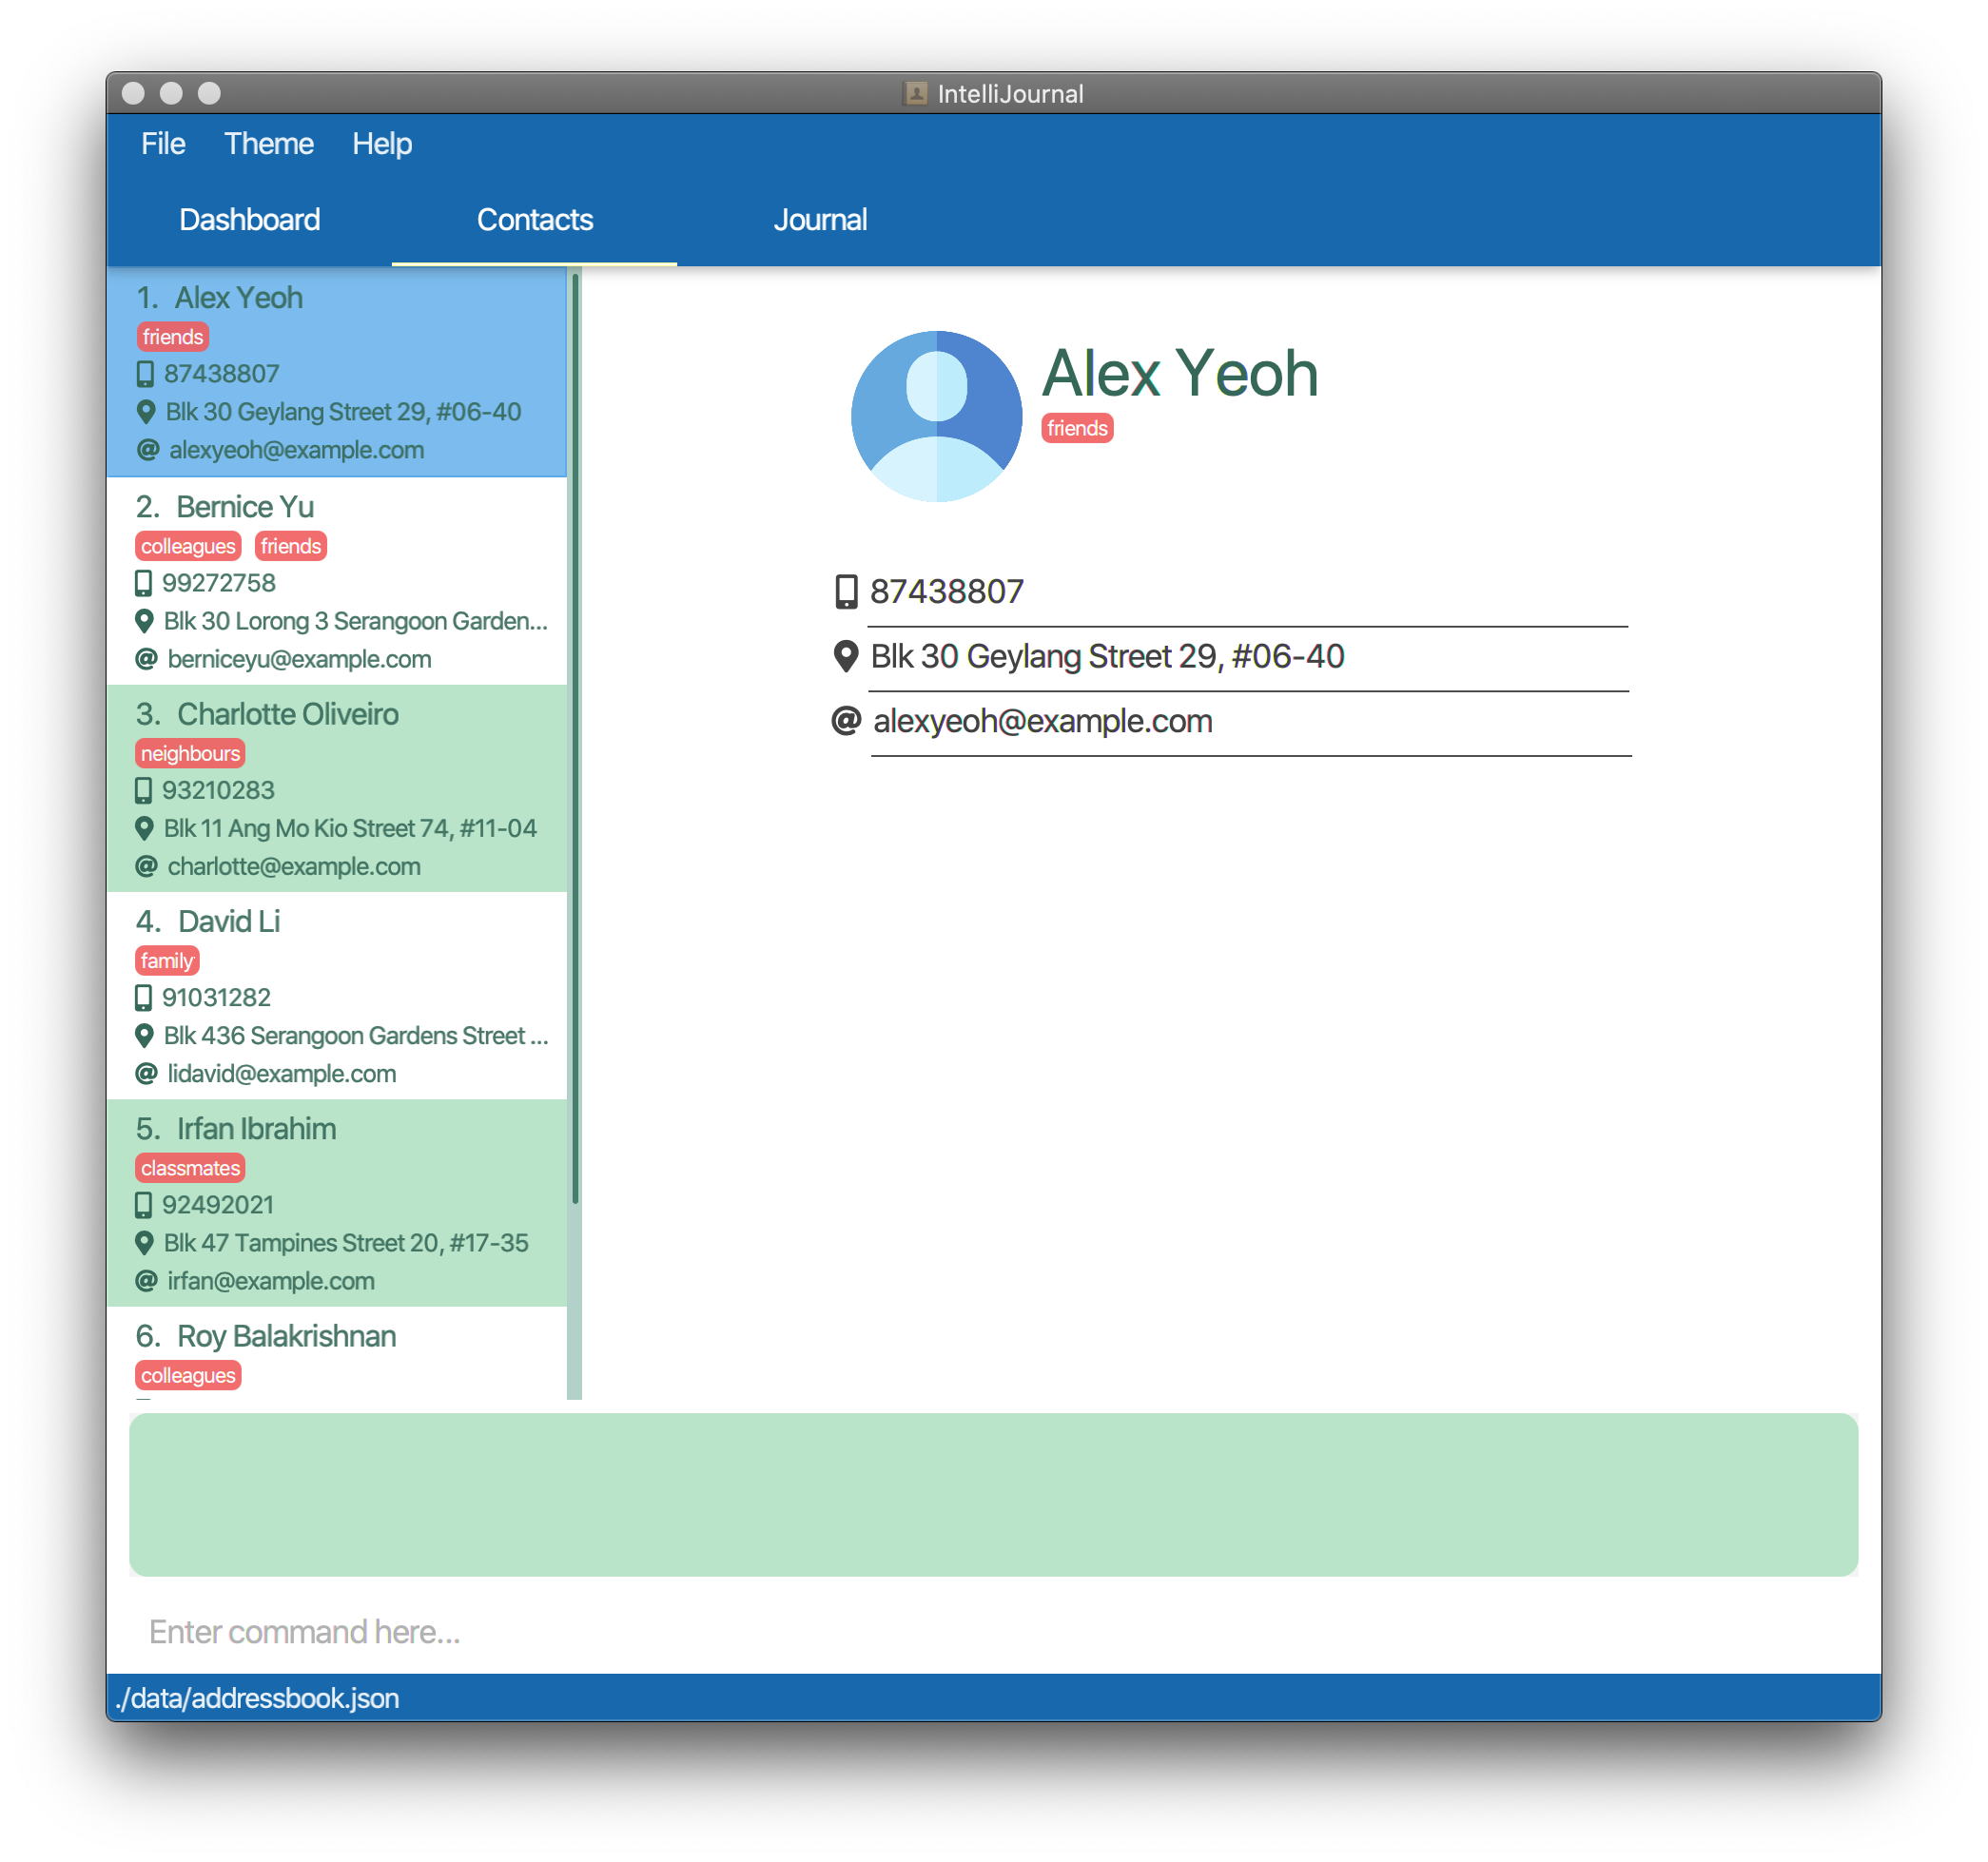
-
Type command
vc 4, or equivalently,viewc 4, IntelliJournal will select the 4th contact in the list, and display its details on the right. Note that the red rectangle is for demonstration purpose instead of being part of the application interface.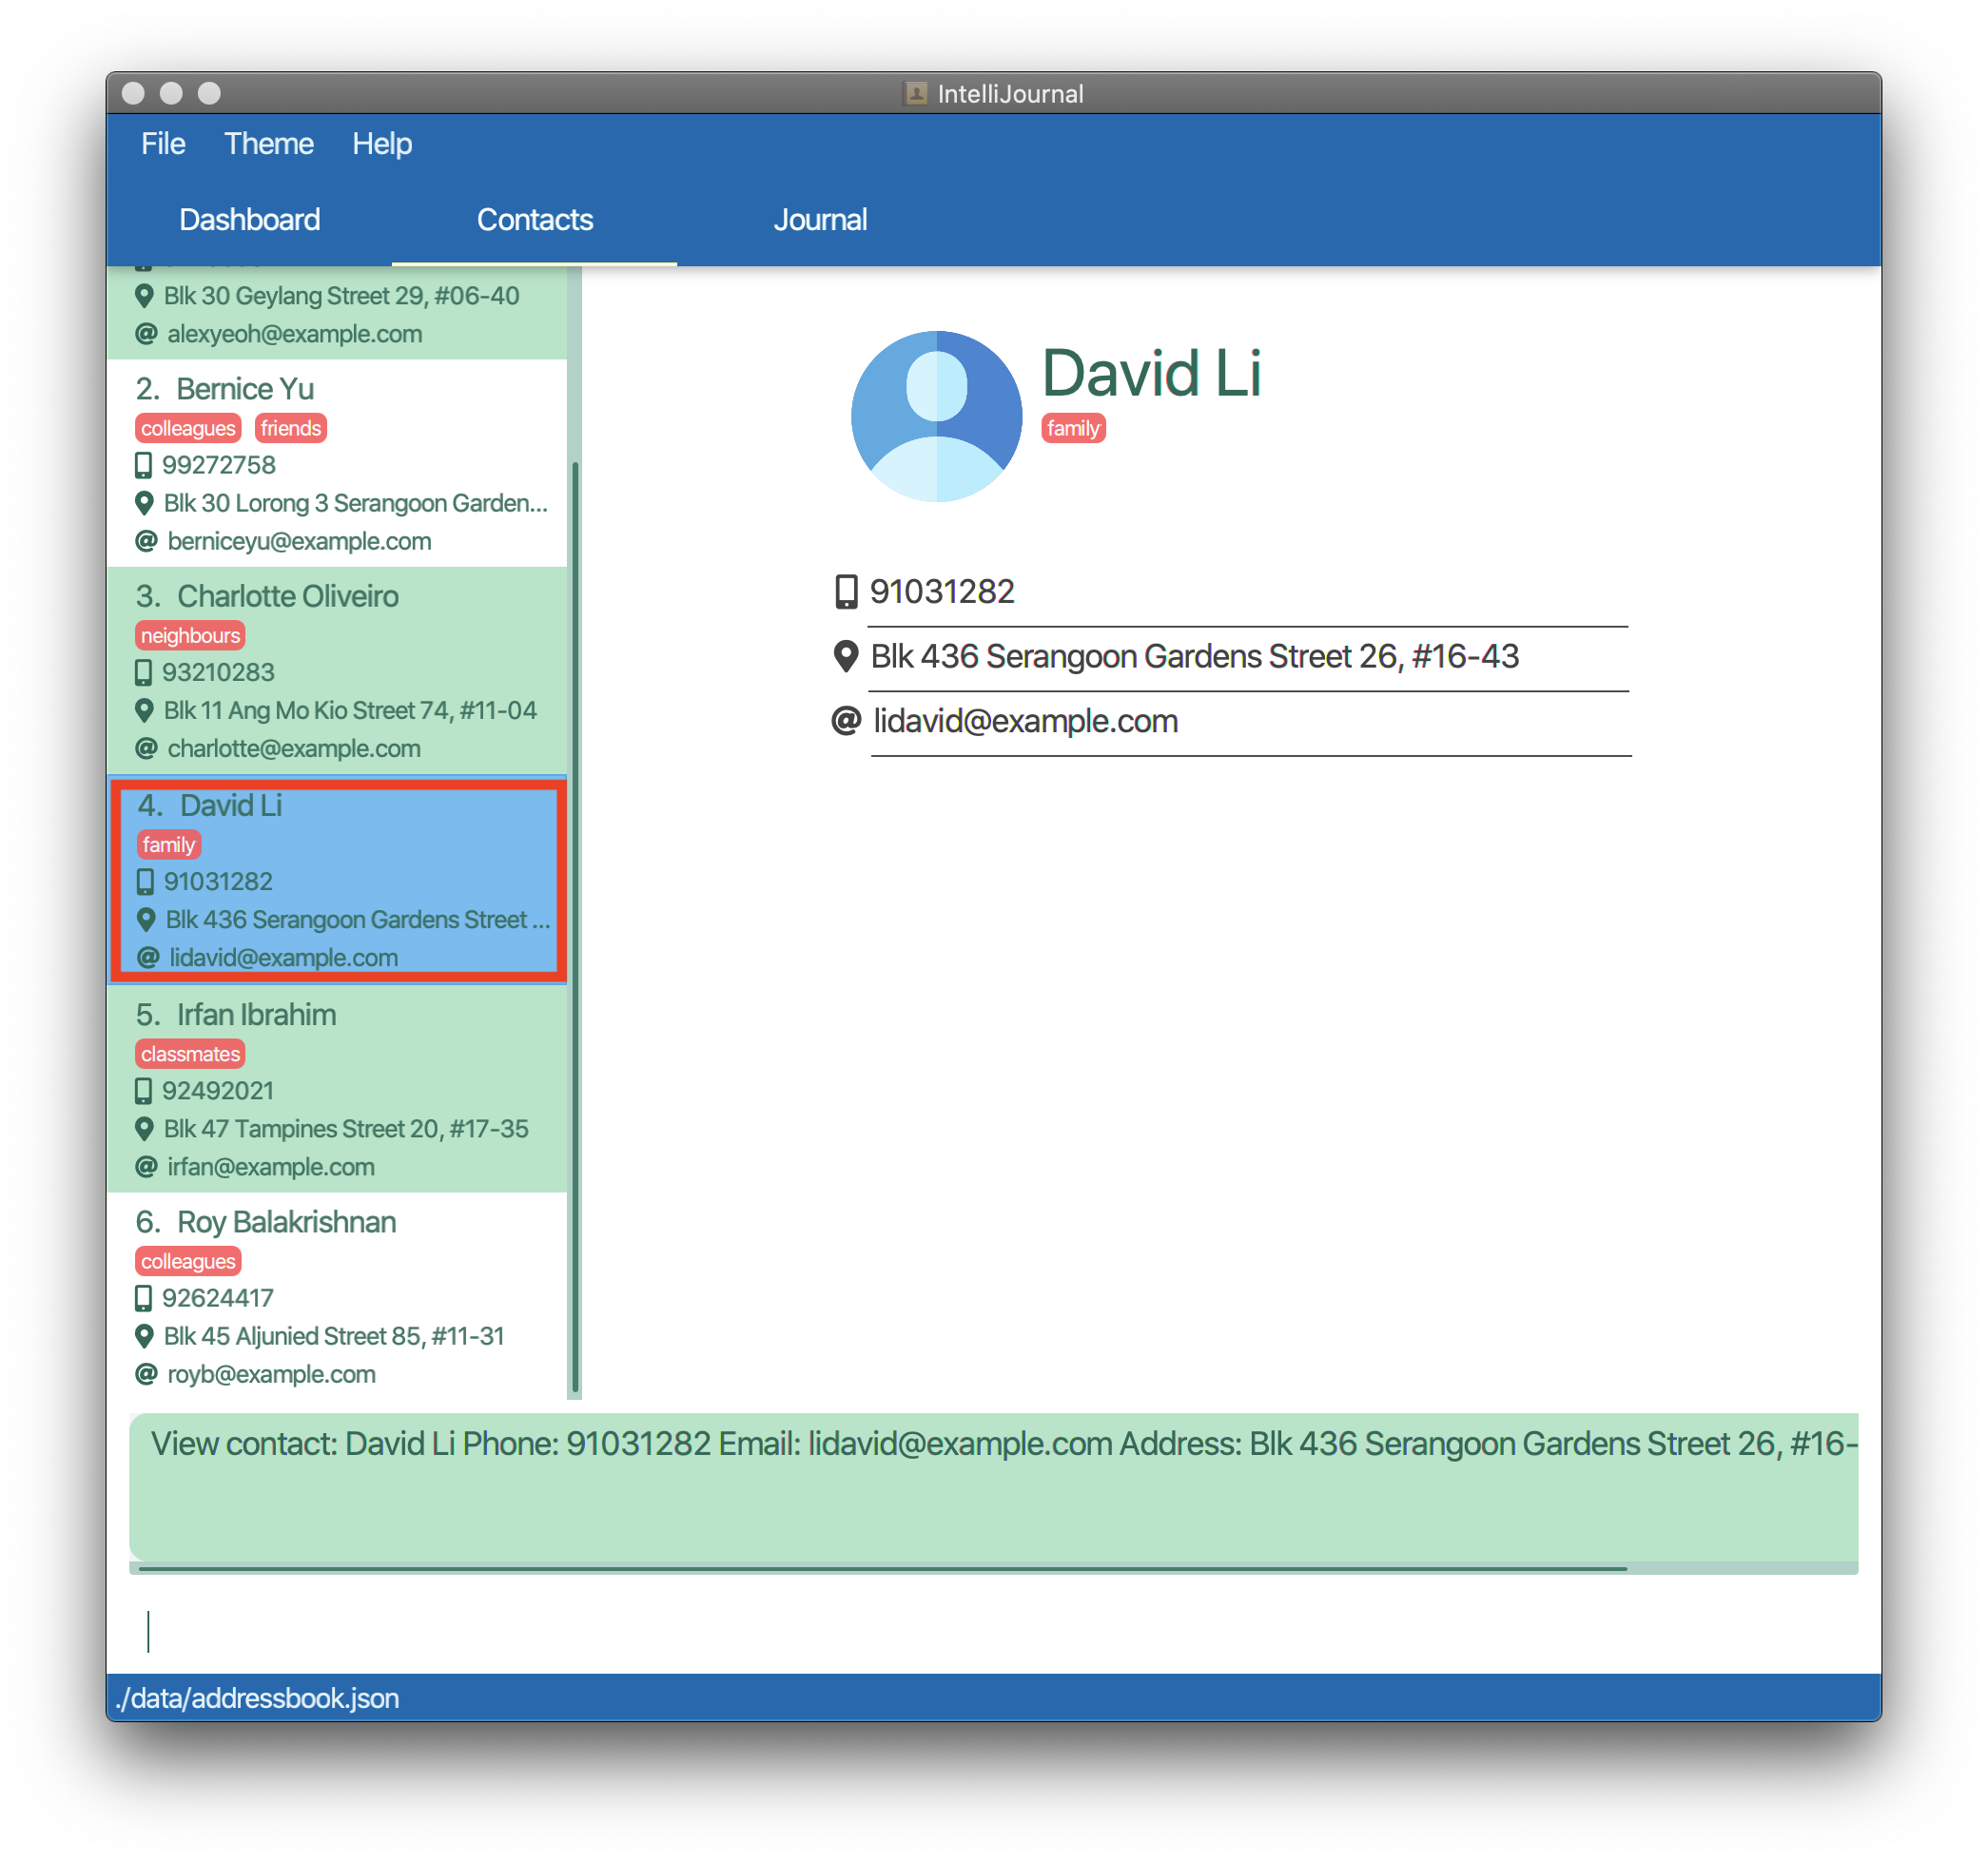
Finding contacts: findc
Finds a list of contacts that satisfy the requirements on particular fields given by the user.
Aliases: findc, fc
Format: findc [n/NAME_KEYWORDS] [p/PHONE_KEYWORDS] [e/EMAIL_KEYWORDS]
[a/ADDRESS_KEYWORDS] [t/TAG]…
![]() Tips:
Tips:
-
TAGmust be alphanumeric, without spaces. - Note that for
TAG, IntelliJournal searches for the exact same tag instead of tags containing any part of the searched terms, so tags are case-sensitive.
Example:
-
Type
findc n/Charlotte a/Ang Mo Kiointo the command box and press enter.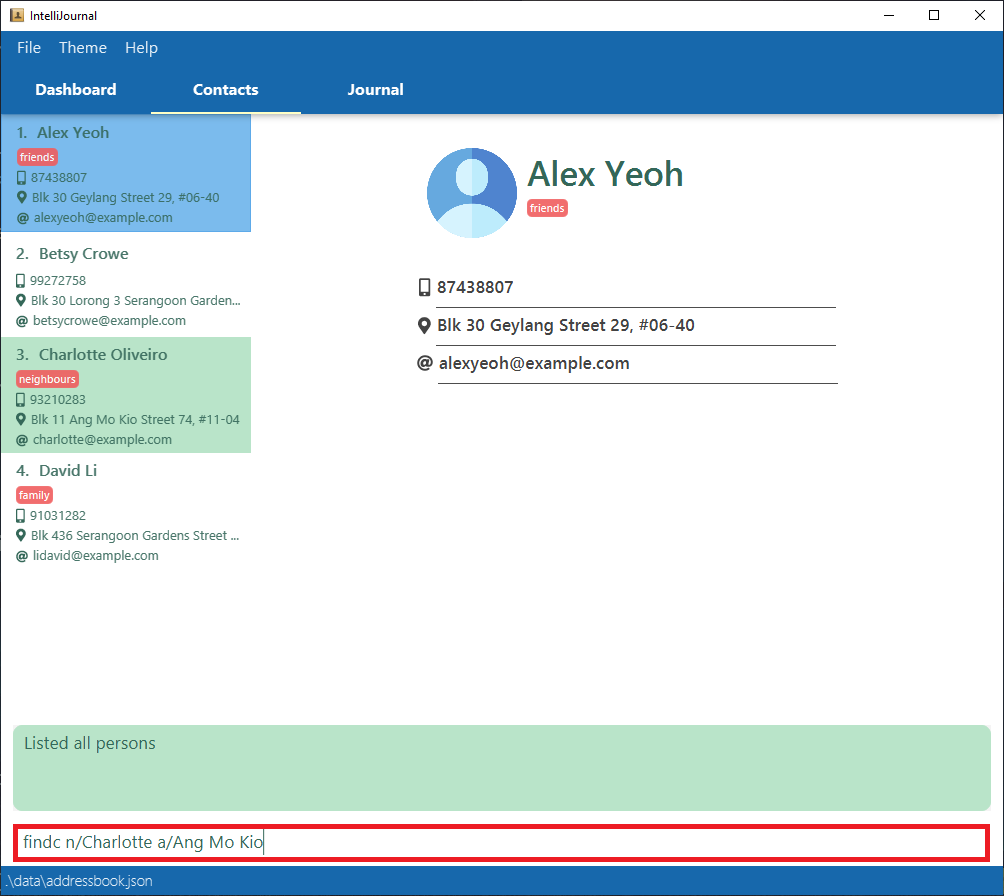
-
This finds all contacts whose name contains
Charlotteand with an address containingAng Mo Kio.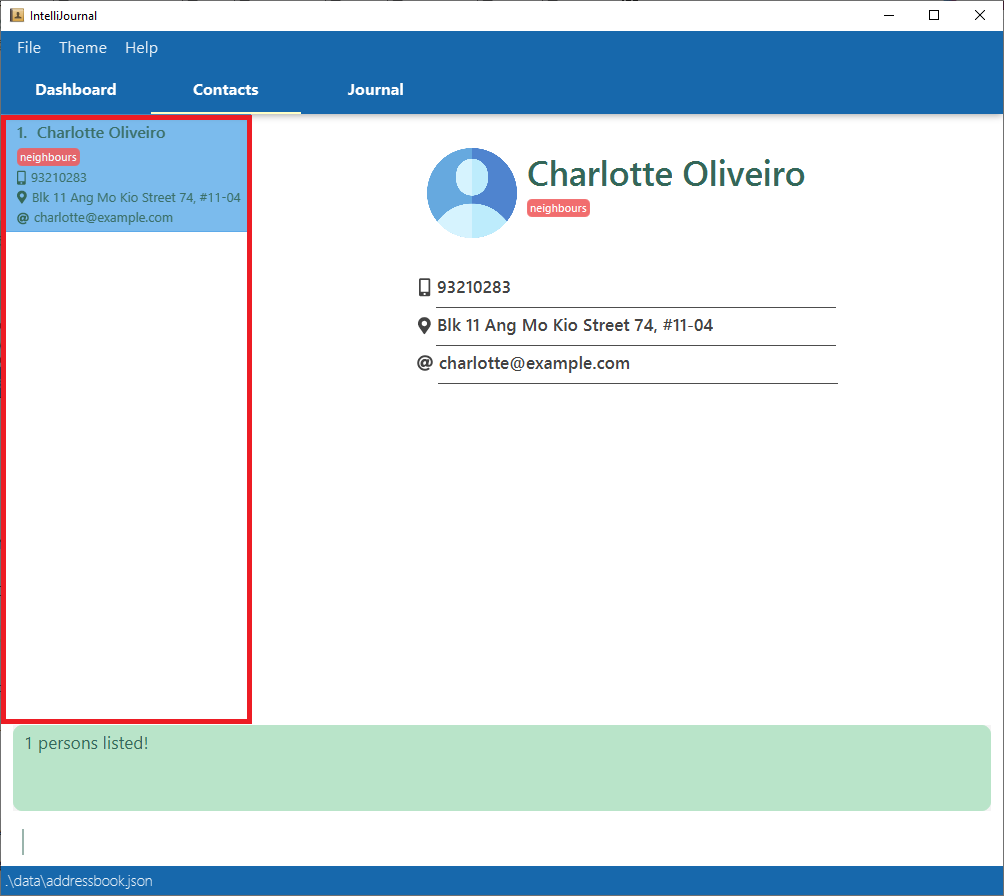
Deleting a contact: deletec
Deletes a contact from the address book.
Aliases: deletec, delc
Format: deletec INDEX
![]() Tip:
Tip: INDEX refers to the index number of the contact in the list.
Example:
-
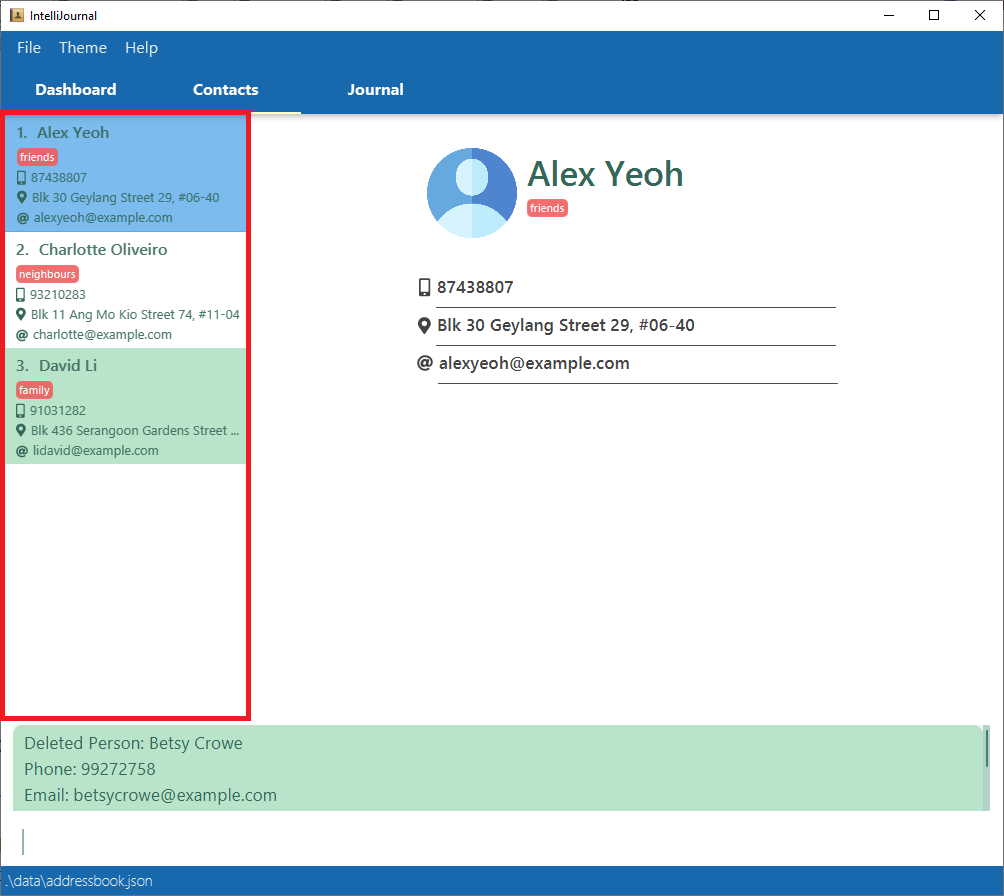
Type
deletec 2into the command box and press enter.
-
This deletes the 2nd contact in the address book.
Clearing the address book: clearc
Clears all contacts in the addressbook.
Aliases: clearc, cc
Format: clearc
Example:
-
Type
clearcinto the command box and press enter.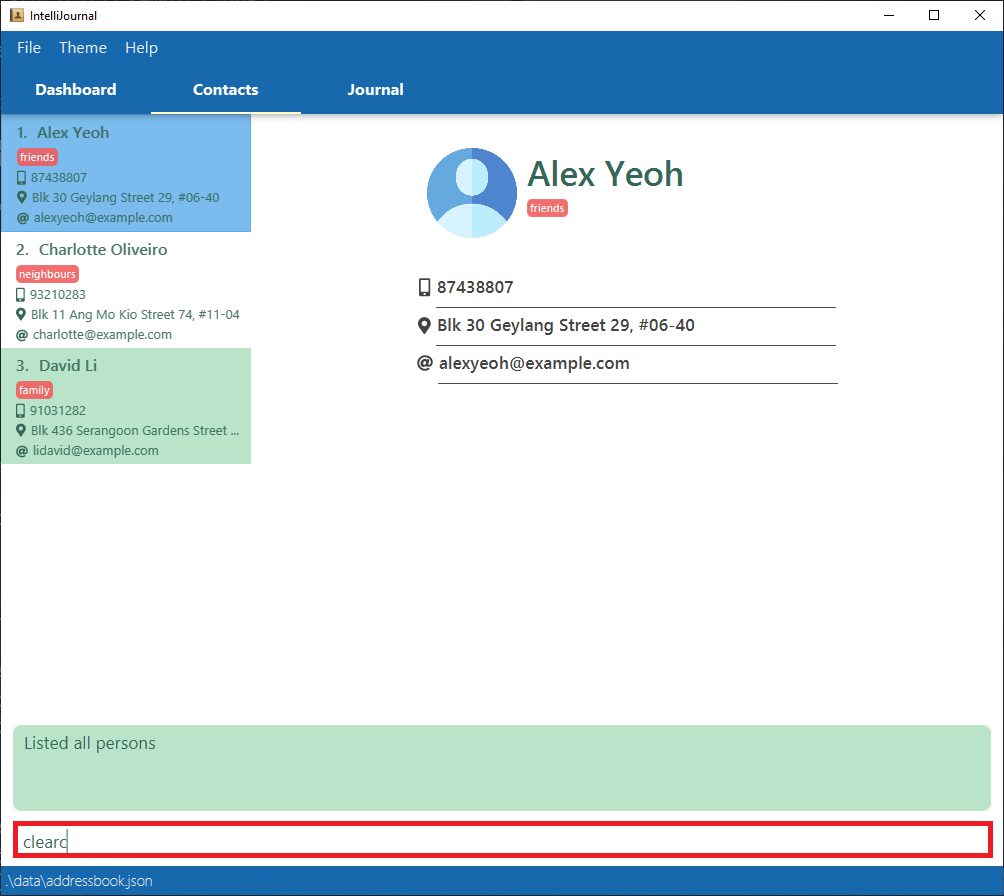
-
This removes all contacts in the address book.

Journal Entries
Adding a journal entry: addjournal
Adds a journal entry to the journal. After adding the journal entry, the app will
move to the Journal tab, scrolling to the entry you just added, displaying the
information of that entry on the right.
Aliases: addjournal, addj
Format: addjournal n/TITLE [at/DATE_AND_TIME] [d/DESCRIPTION]
[with/CONTACT_NAME]… [t/TAG]…
![]() Tips:
Tips:
- A journal entry can have any number of contacts or tags (including 0)
-
CONTACT_NAMEmust be an existing name in the address book. -
CONTACT_NAMEis case-insensitive, and does not need to be capitalised to find contacts required. -
DATE_AND_TIMEmust be in the format: “YYYY-MM-DD HH:MM”. -
TAGmust be alphanumeric, without spaces.
Example:
-
Type
addjournal n/Meeting with client at/2020-09-20 14:00 d/Teainto the command box and press enter.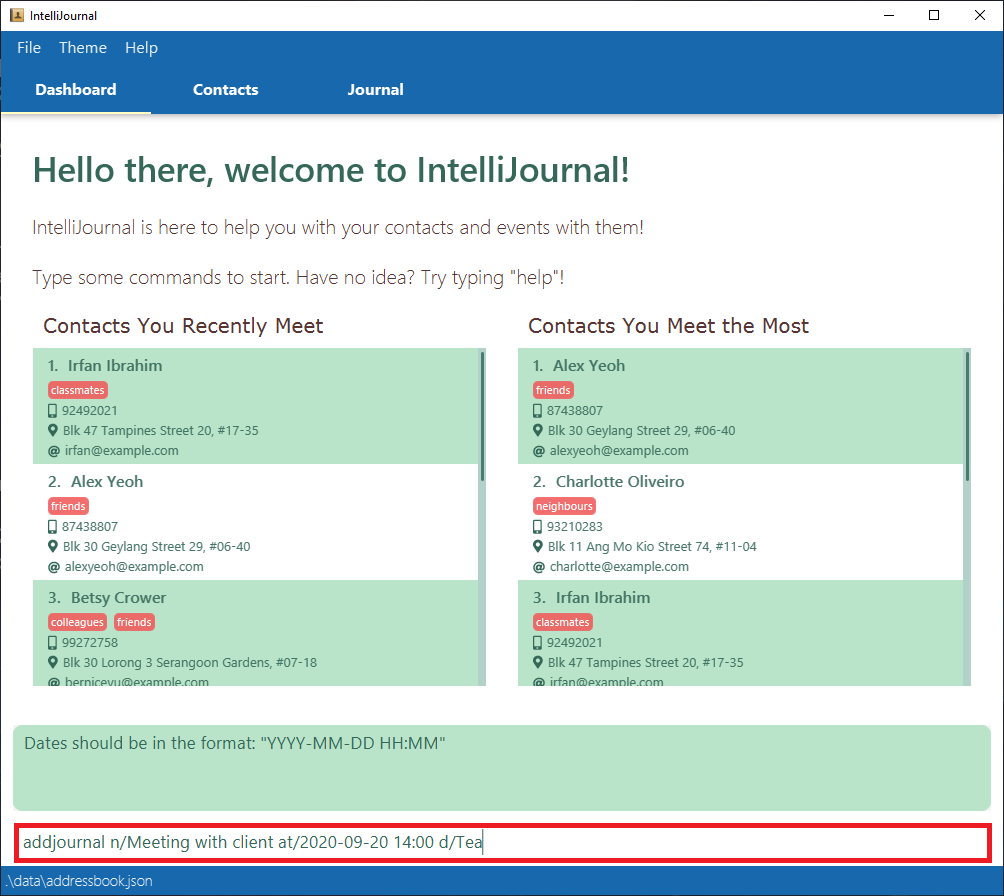
-
This creates a journal entry with the title
Meeting with client, occurring at2020-09-20 14:00and with descriptionTea.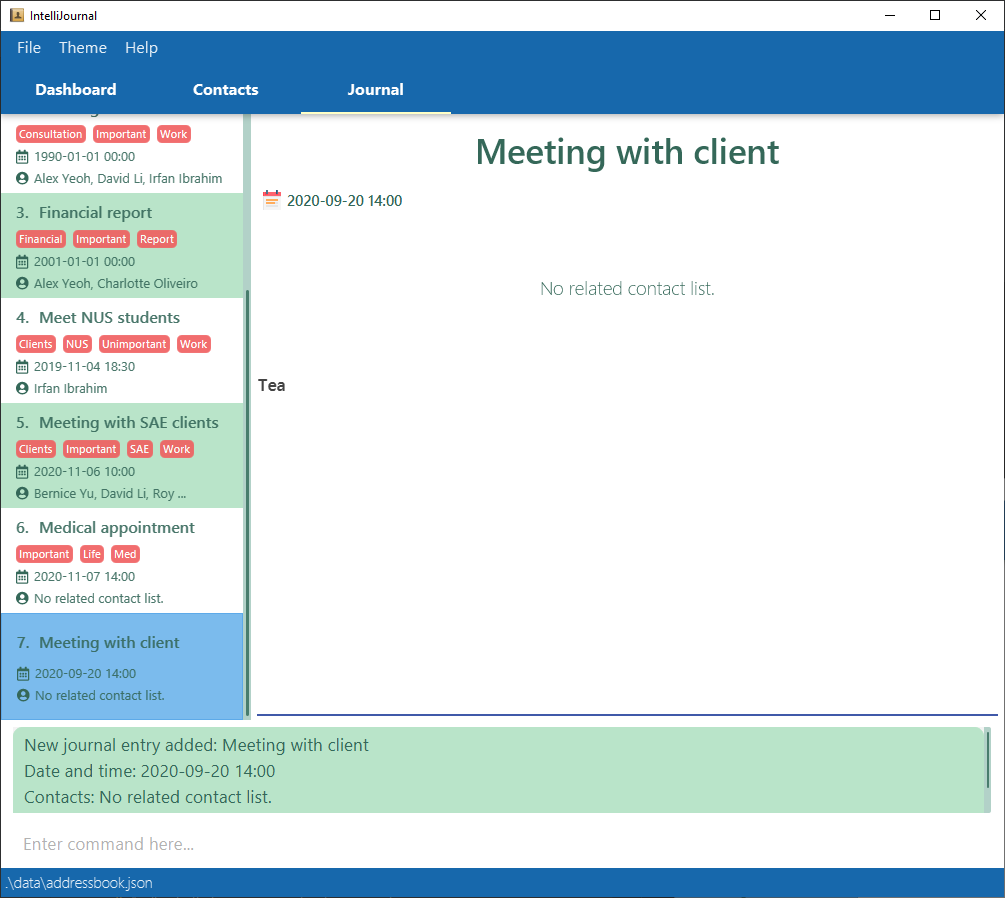
Listing all journal entries: listj
Lists all journal entries in the journal.
Aliases: listj, lj
Format: listj
Example:
-
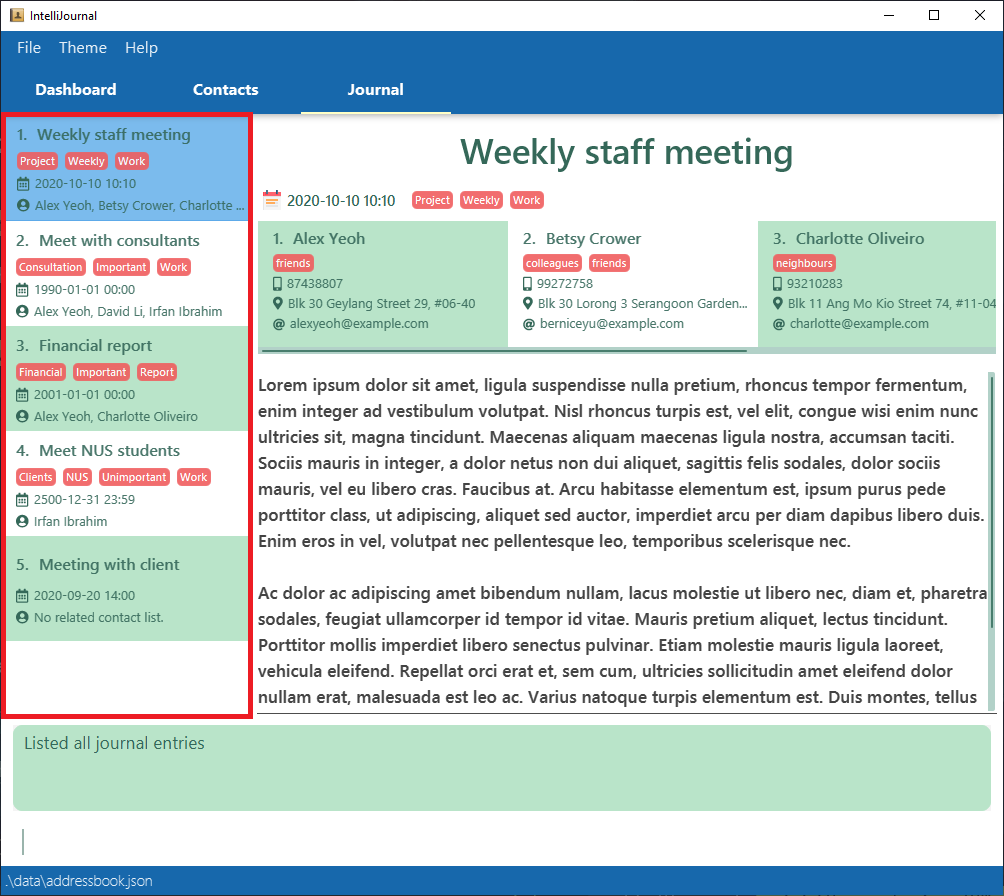
Type
listjinto the command box and press enter.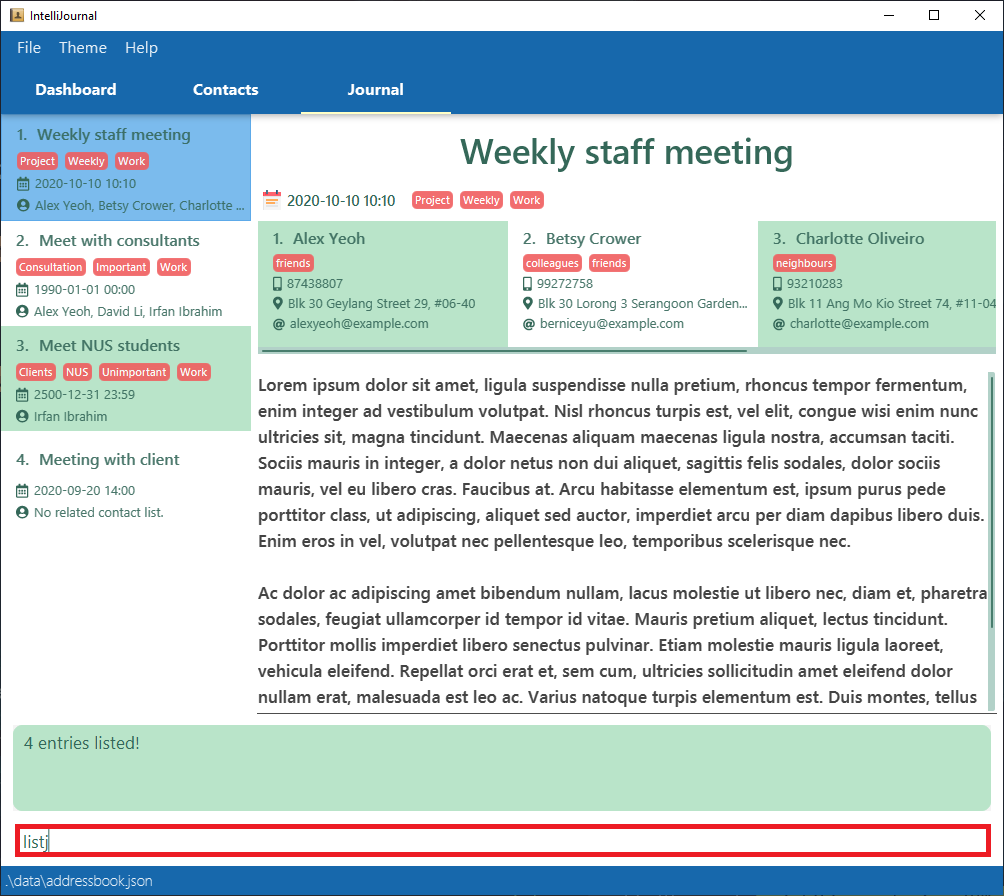
-
You will be directed to the journal tab, with all the journal entries listed on the sidebar.
Editing a journal entry: editj
Edits an existing entry in the journal.
Aliases: editj, edj
Format: editj INDEX [n/TITLE] [at/DATE_AND_TIME] [d/DESCRIPTION]
[with/CONTACT_NAME]… [t/TAG]…
![]() Tips:
Tips:
- Edits the contact at the specified
INDEX. The index refers to the index number shown in the displayed contact list. -
CONTACT_NAMEis case-insensitive, and does not need to be capitalised to find contacts required. - At least one of the optional fields must be provided.
- Existing values will be updated to the input values.
- When editing tags, the existing tags of the entry will be removed i.e adding of tags is not cumulative.
- You can remove all the entry’s tags by typing t/ without specifying any tags after it.
- After editing a journal entry, the list displayed in the
Journaltab will be reset to show all existing contacts, because the previous filtering operation may not still have the same effects on the edited contact. -
DATE_AND_TIMEmust be in the format: “YYYY-MM-DD HH:MM” -
TAGmust be alphanumeric, without spaces.
Example:
-
Type
editj 1 n/Meeting with client at/2020-09-20 14:00 d/Teainto the command box and press enter.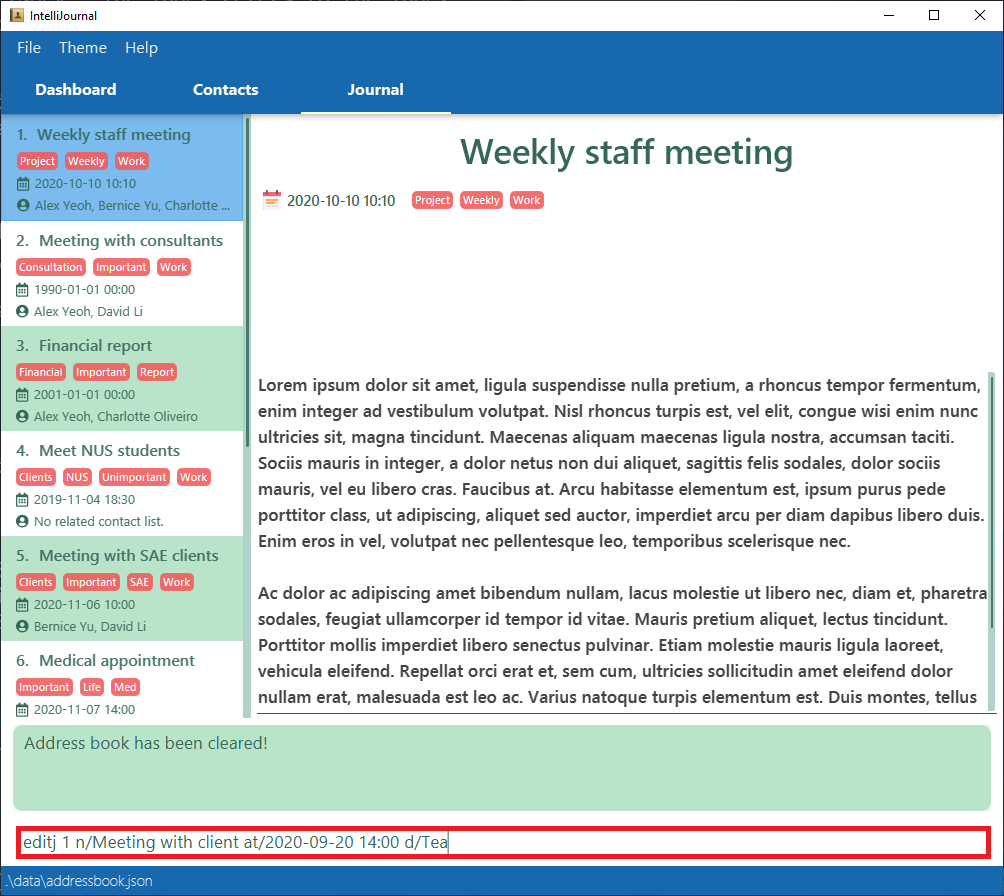
-
This edits the title, date and description of the first journal entry to be
Meeting with client,2020-09-20 14:00andTearespectively.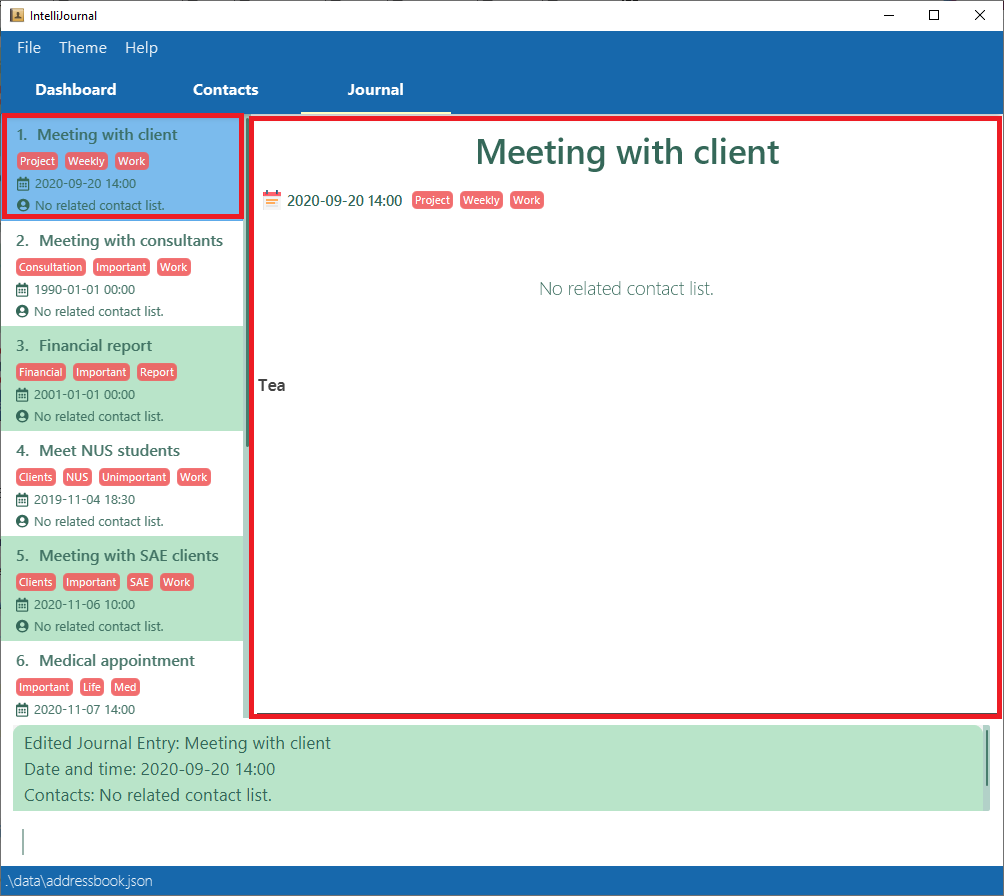
Viewing a journal entry: viewj
Opens up a journal entry in the current displayed list to show further details.
Aliases: viewj, vj
Format: viewj INDEX
- If you type a
viewjcommand when IntelliJournal displaysJournaltab, IntelliJournal will select the journal entry at the specified index and display its details on the right. - If a
viewjcommand is executed when IntelliJournal displays another tab (i.e.Contactstab orDashboardtab), IntelliJournal will automatically navigate to theJournaltab, select the journal entry at the specified index, and display its details on the right.
![]() Tips:
Tips:
-
INDEXrefers to the index number of the journal entry in the current displayed list, instead of the index number of the journal entry in the full unfiltered list, which, for example, may have been filtered using afindjcommand. More details about a filtered journal entry list can be found under the Finding journal entries:findjsection. -
INDEXmust be a positive integer, which does not exceed the number of journal entries in the current displayed list.
Example:
-
Open the
Journaltab, IntelliJournal should display a list of journal entries on the left with detailed content on the right. If no entry has been selected to display, IntelliJournal will automatically select the first entry to show its details.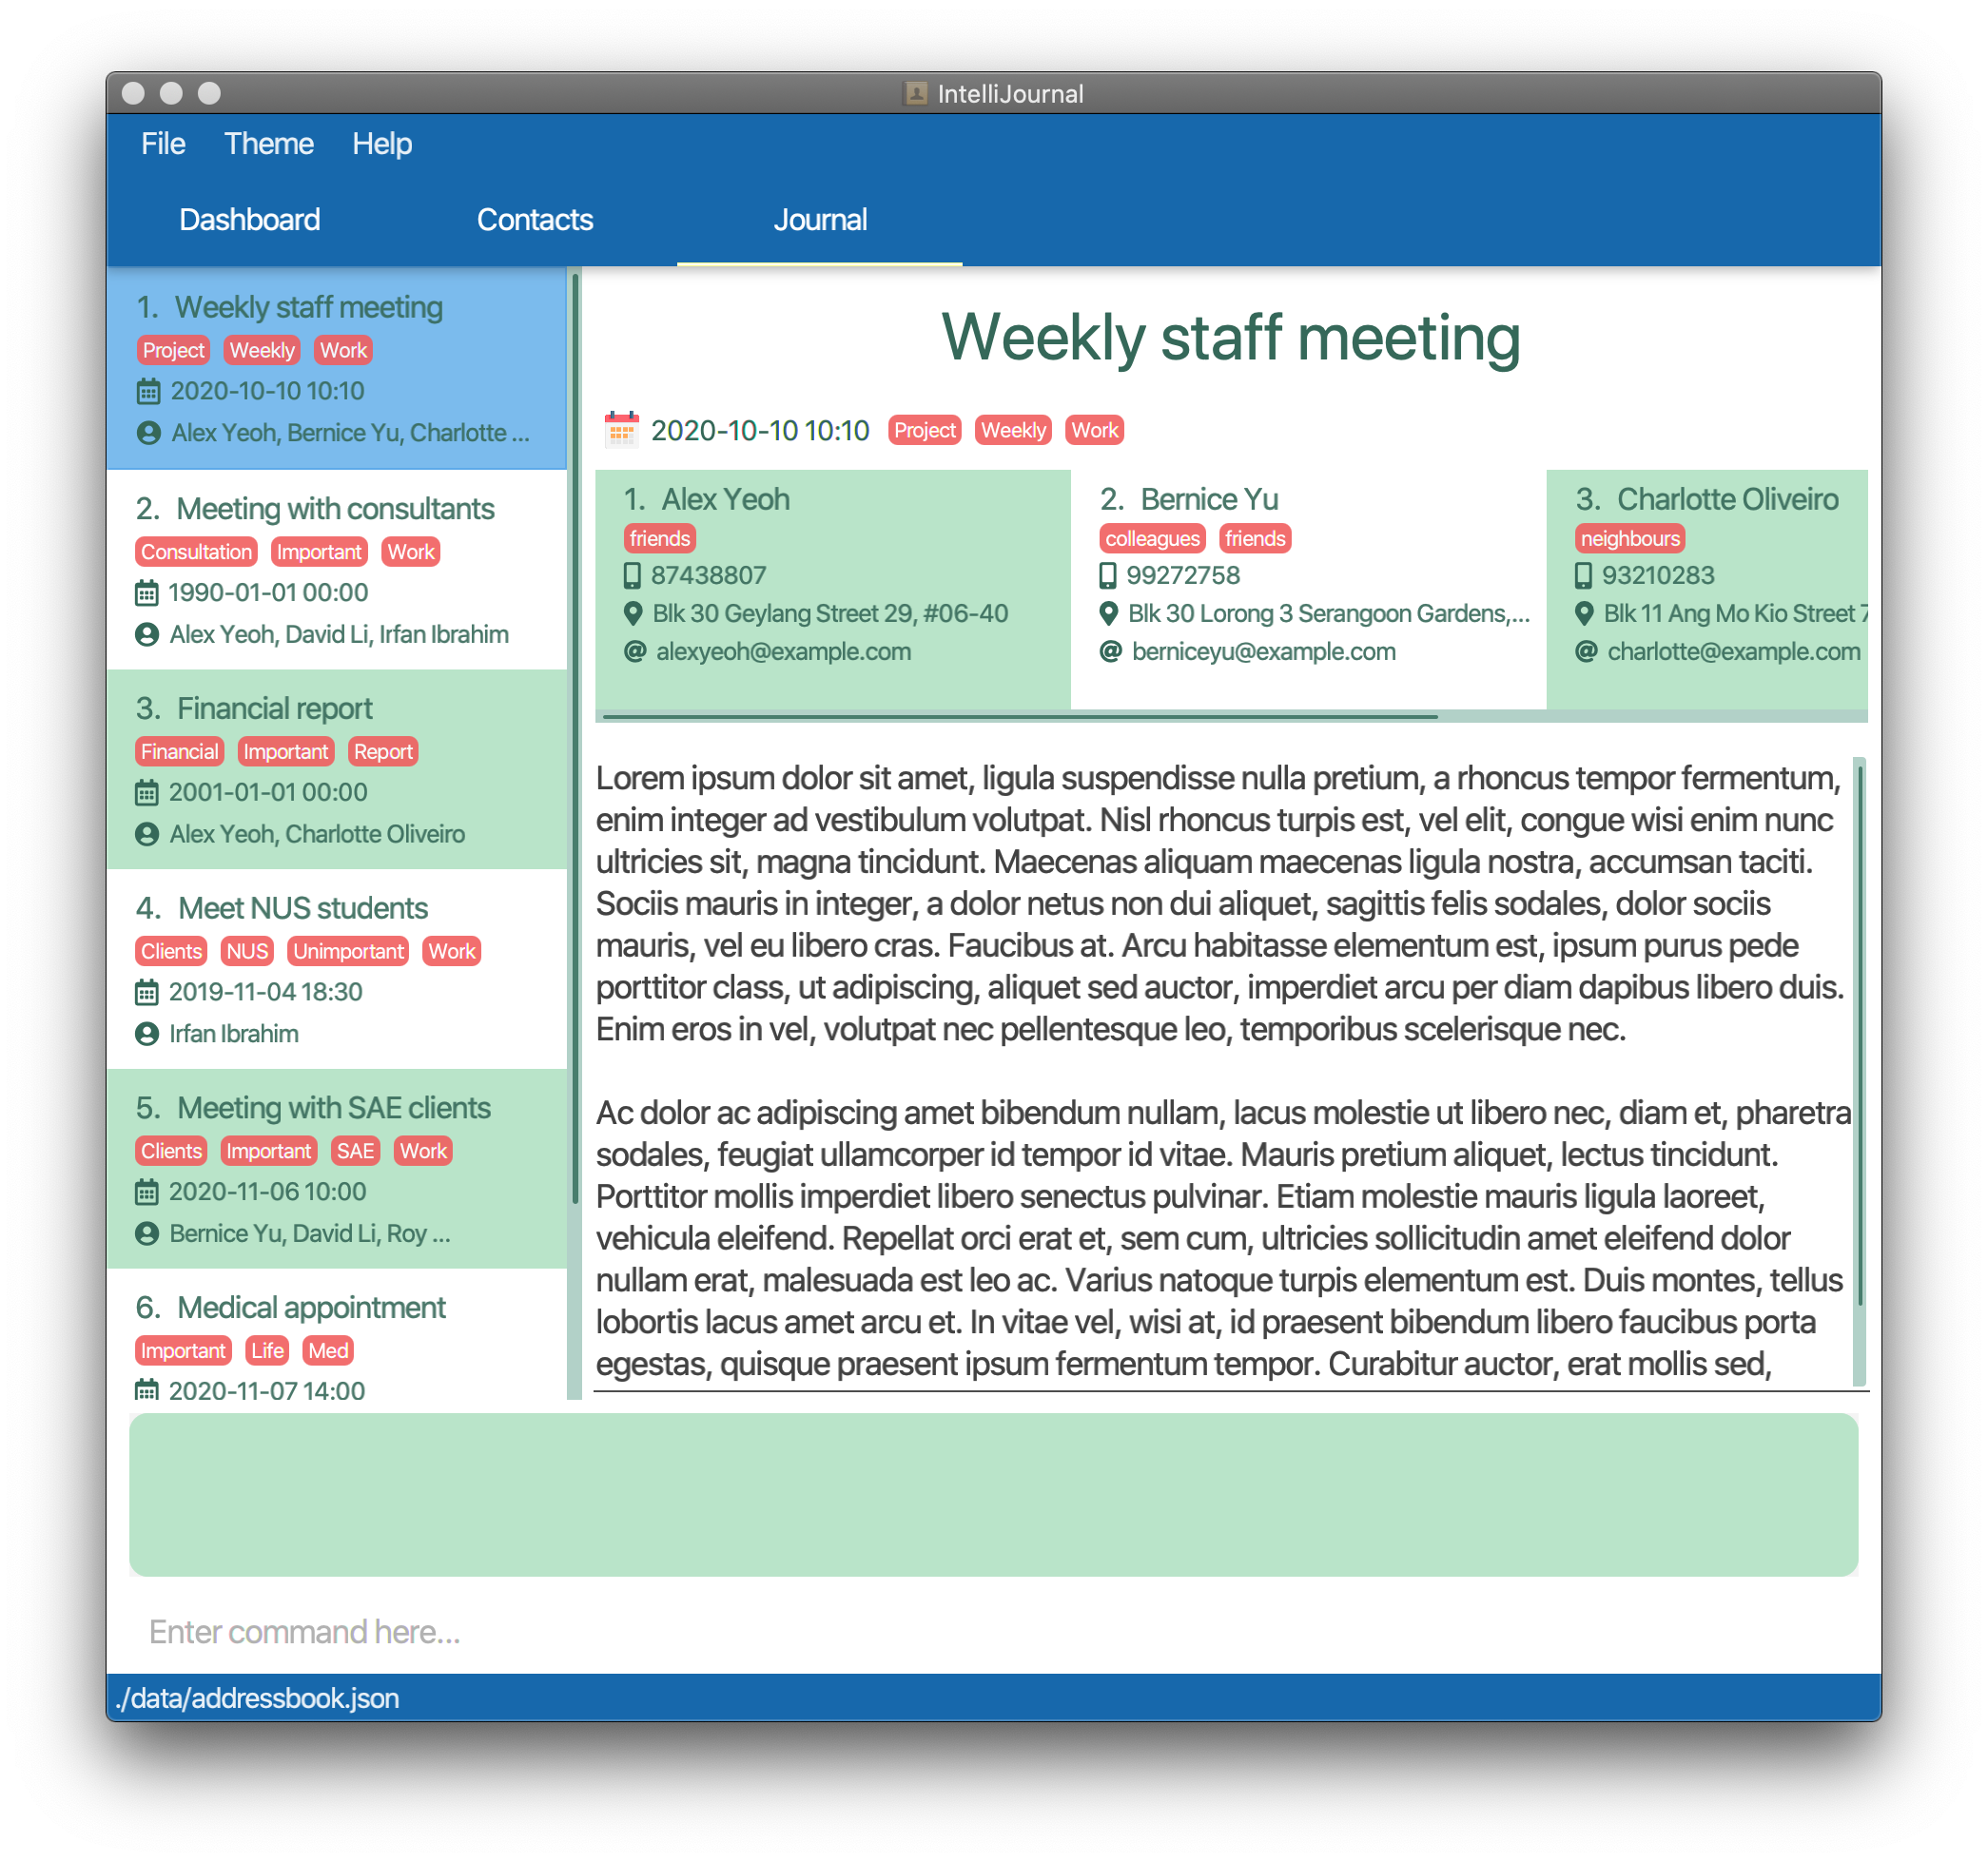
-
Type command
vj 4, or equivalently,viewj 4, IntelliJournal will select the 4th entry in the list, and display its details on the right. Note that the red rectangle is for demonstration purpose instead of being part of the application interface.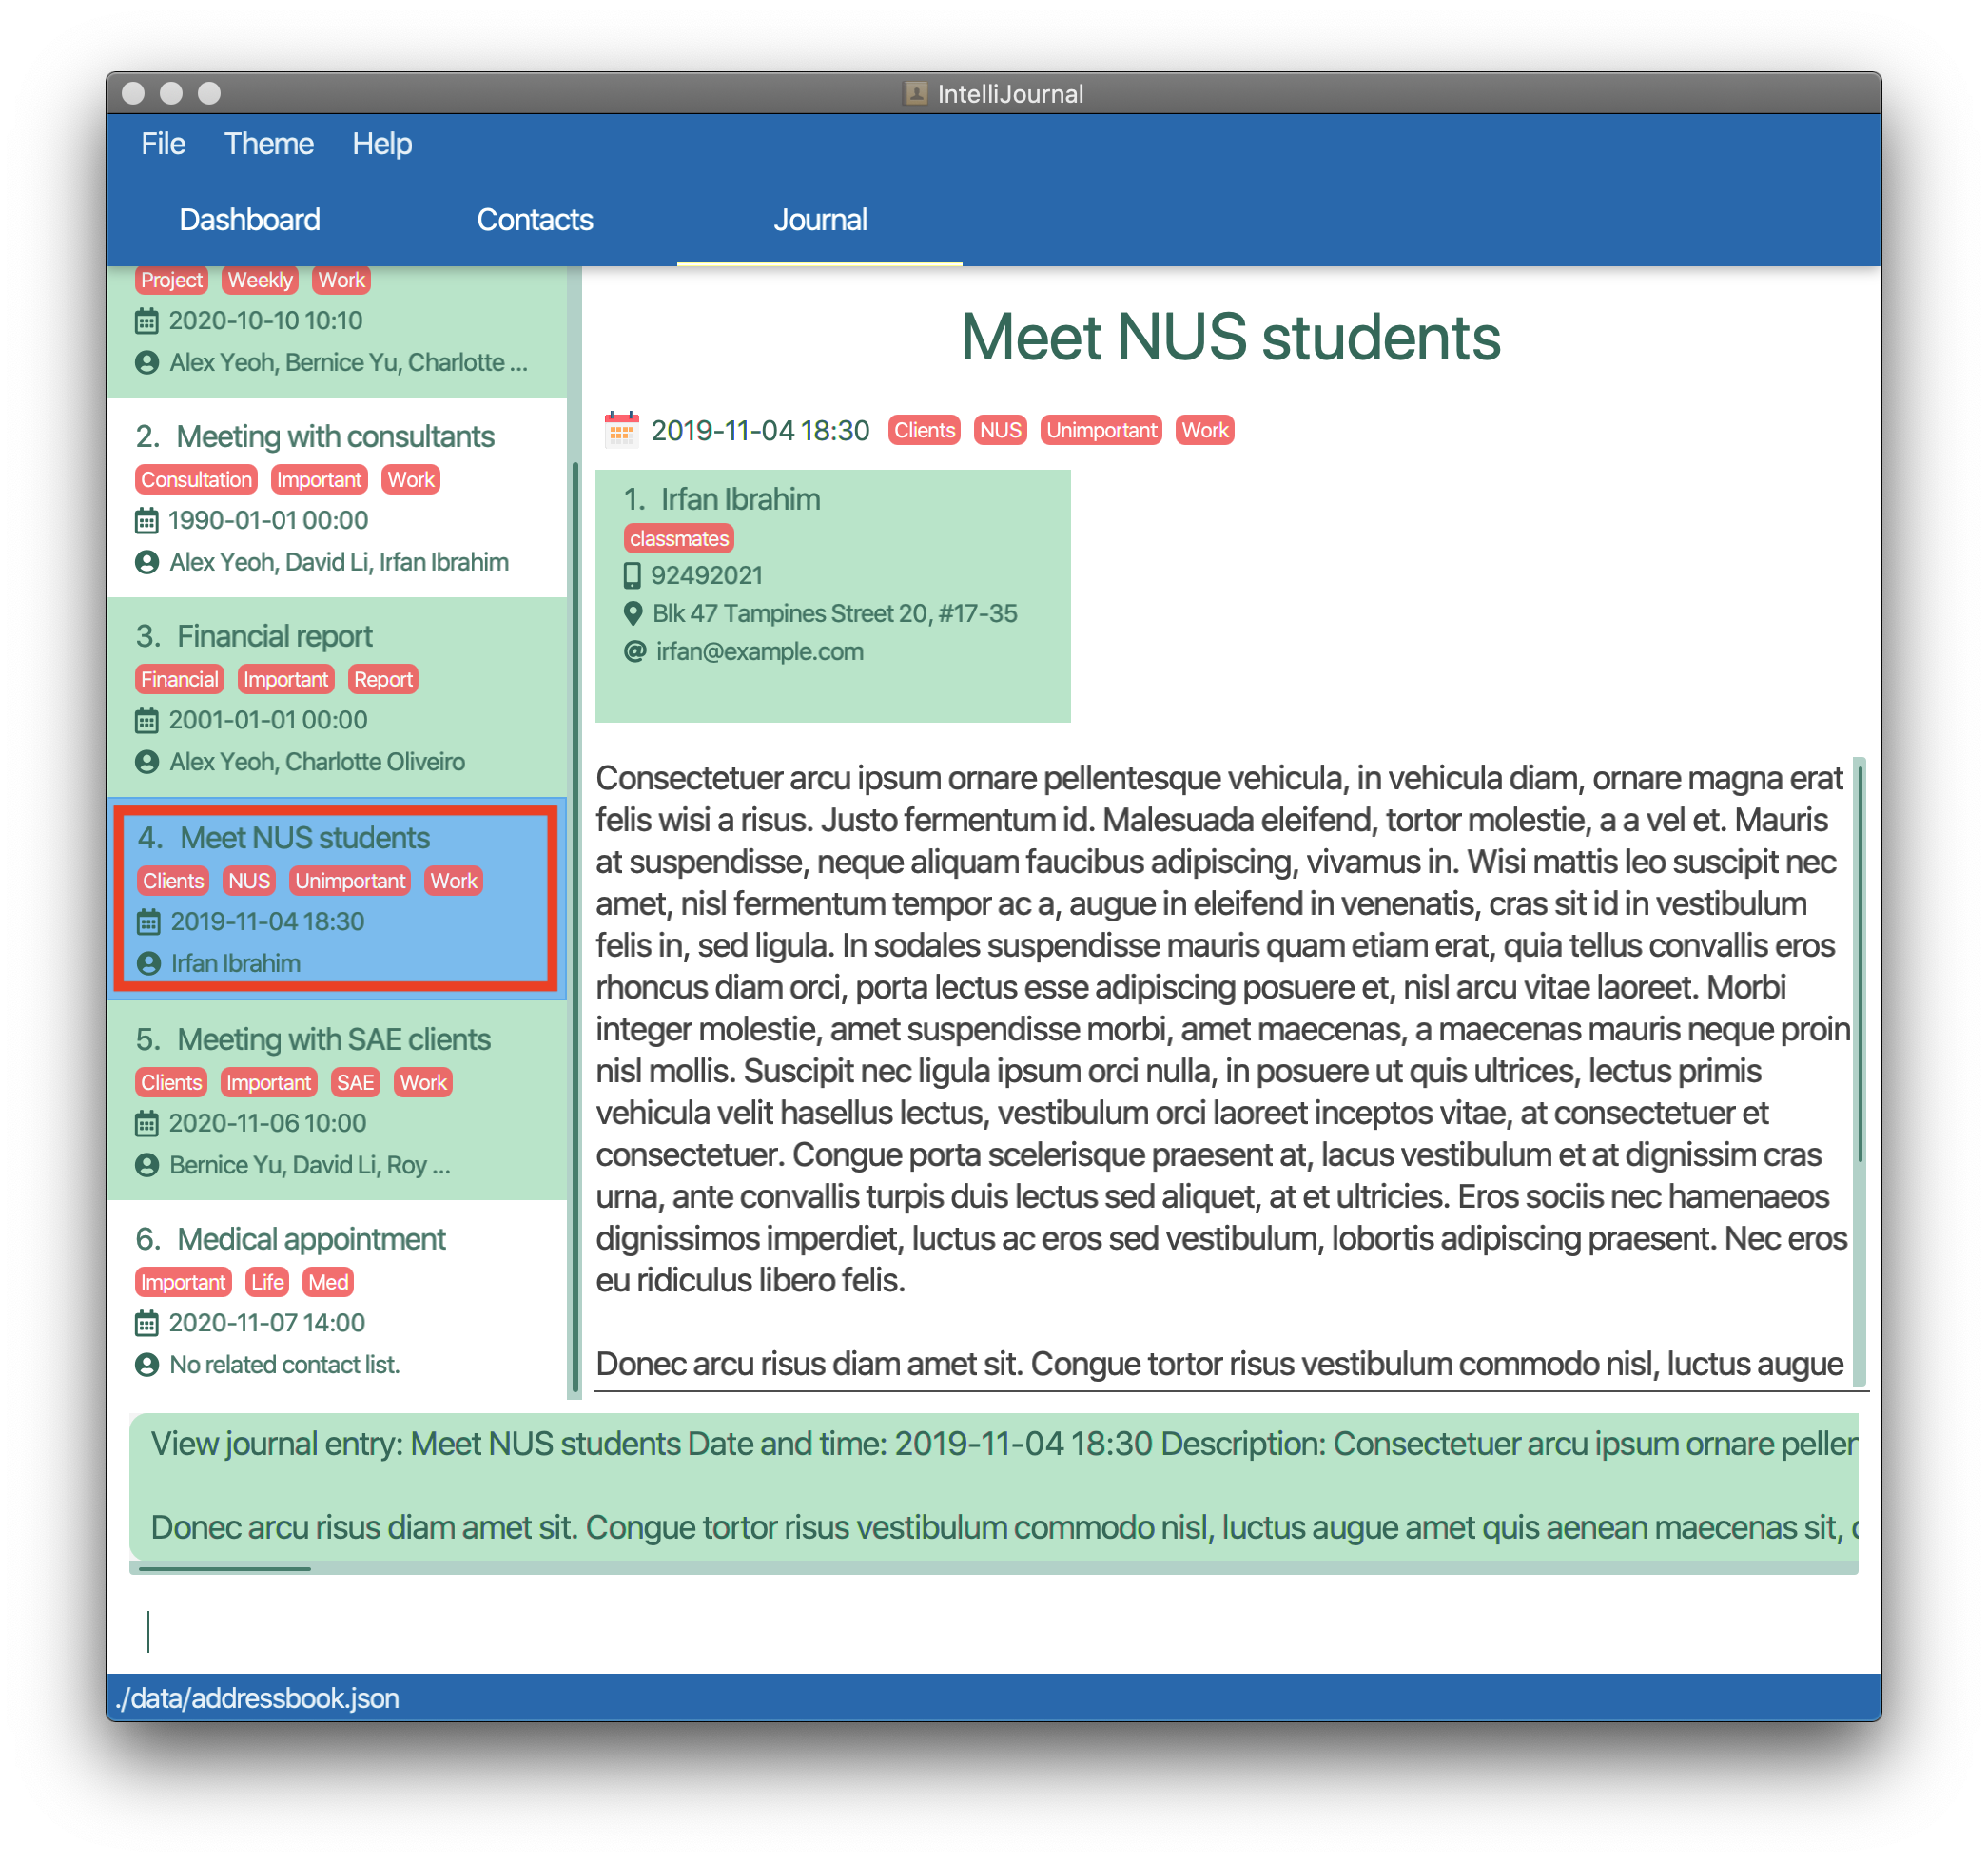
Finding journal entries: findj
Finds a list of journal entries that satisfy the requirements on particular fields given by the user.
Aliases: findj, fj
Format: findj [n/TITLE_KEYWORDS] [at/DATE_AND_TIME]
[with/CONTACT_NAME_KEYWORDS]… [d/DESCRIPTION_KEYWORDS] [t/TAG]…
![]() Tips:
Tips:
-
DATE_AND_TIMEmust be in the format: “YYYY-MM-DD HH:MM” -
TAGmust be alphanumeric, without spaces. - Note that for
TAG, IntelliJournal searches for the exact same tag instead of tags containing any part of the searched terms, so tags are case-sensitive.
Example:
-
Type
findj n/Meetinginto the command box and press enter.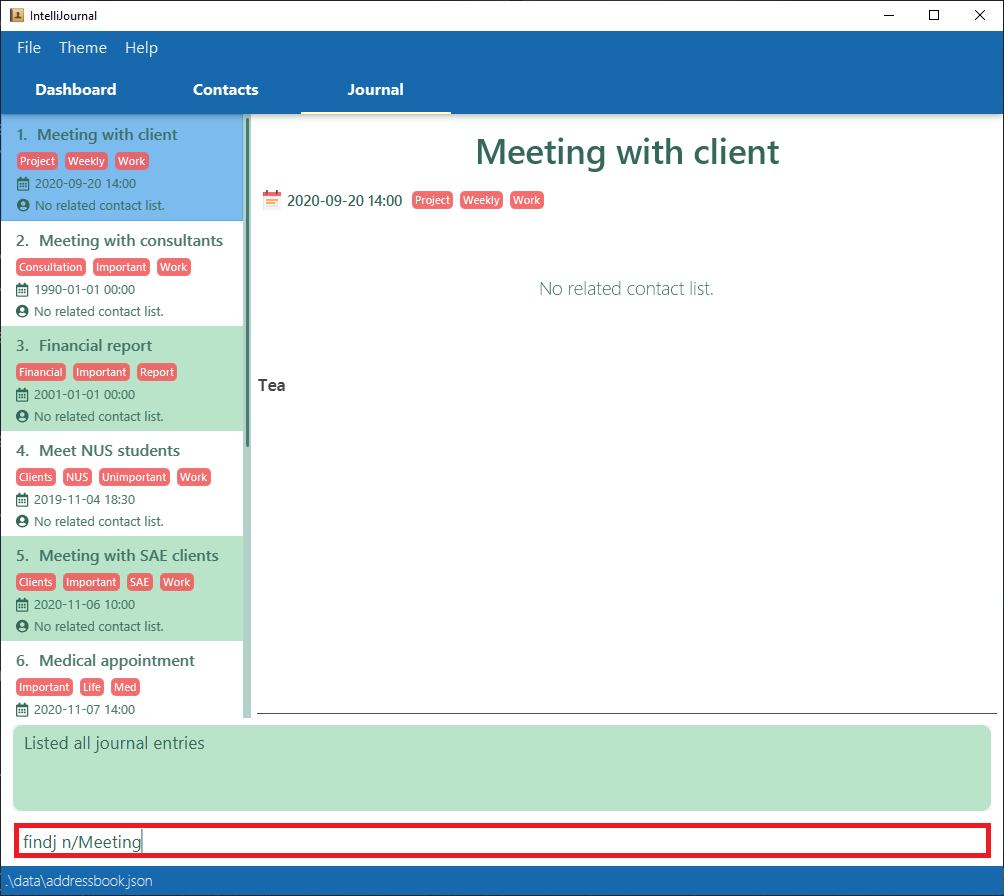
-
This finds all journal entries with a title containing
Meeting.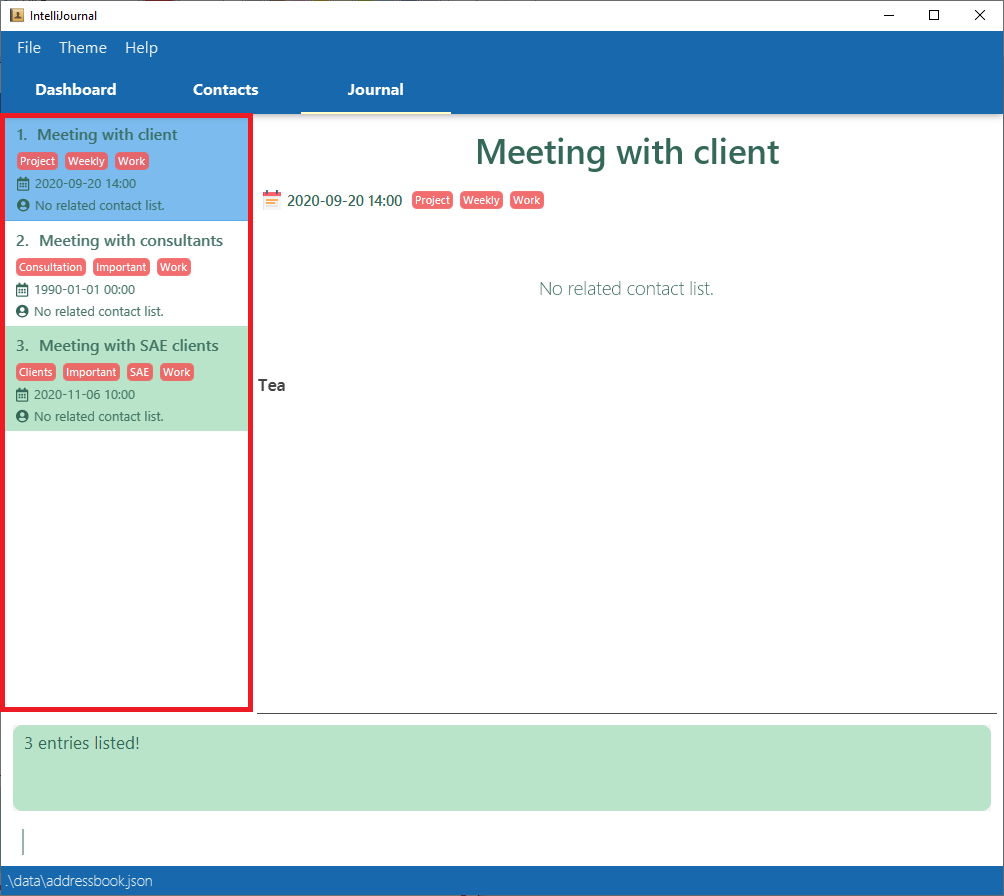
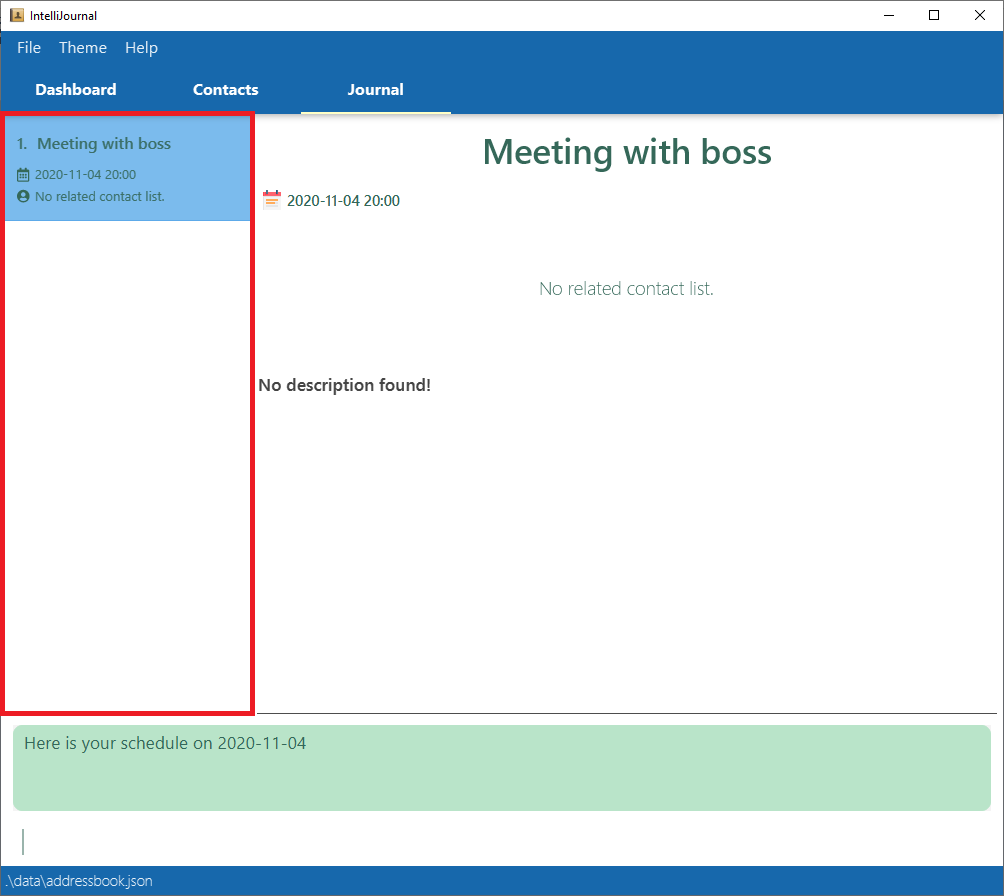
Checking schedule: check
Finds a list of journal entries for a date given by the user.
Aliases: check, ck
Format: check [DATE]
Example 1:
-
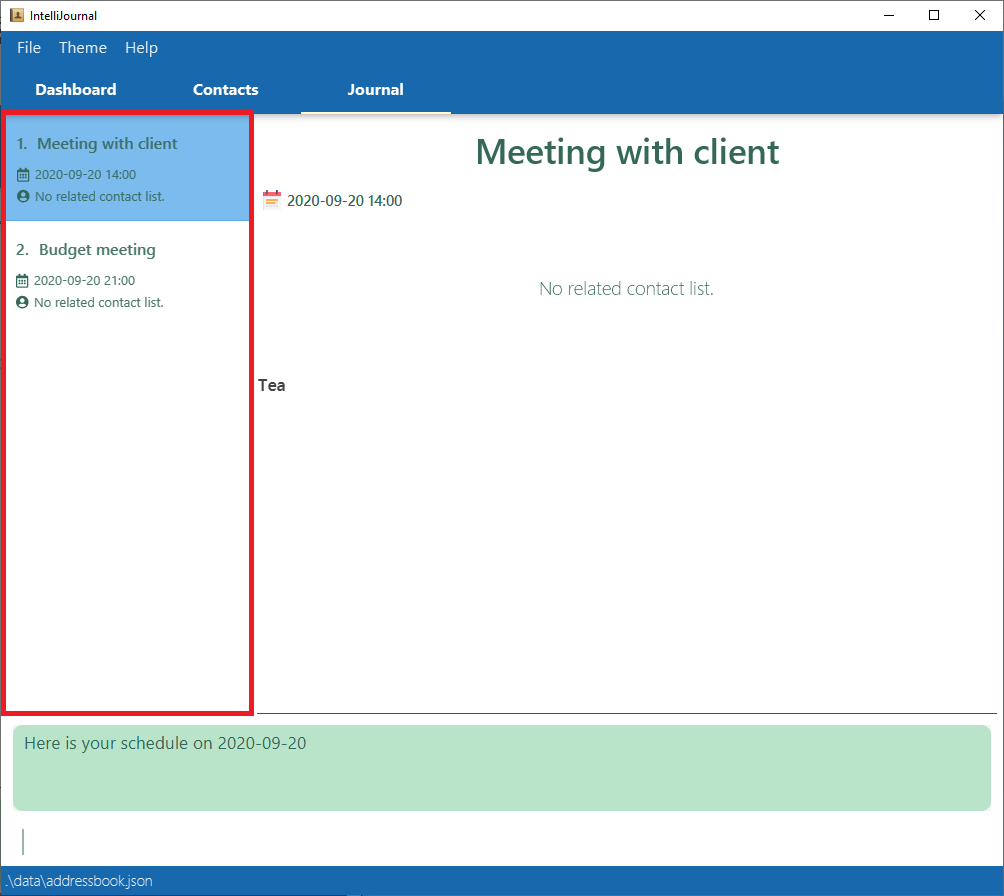
Type
check 2020-09-20into the command box and press enter.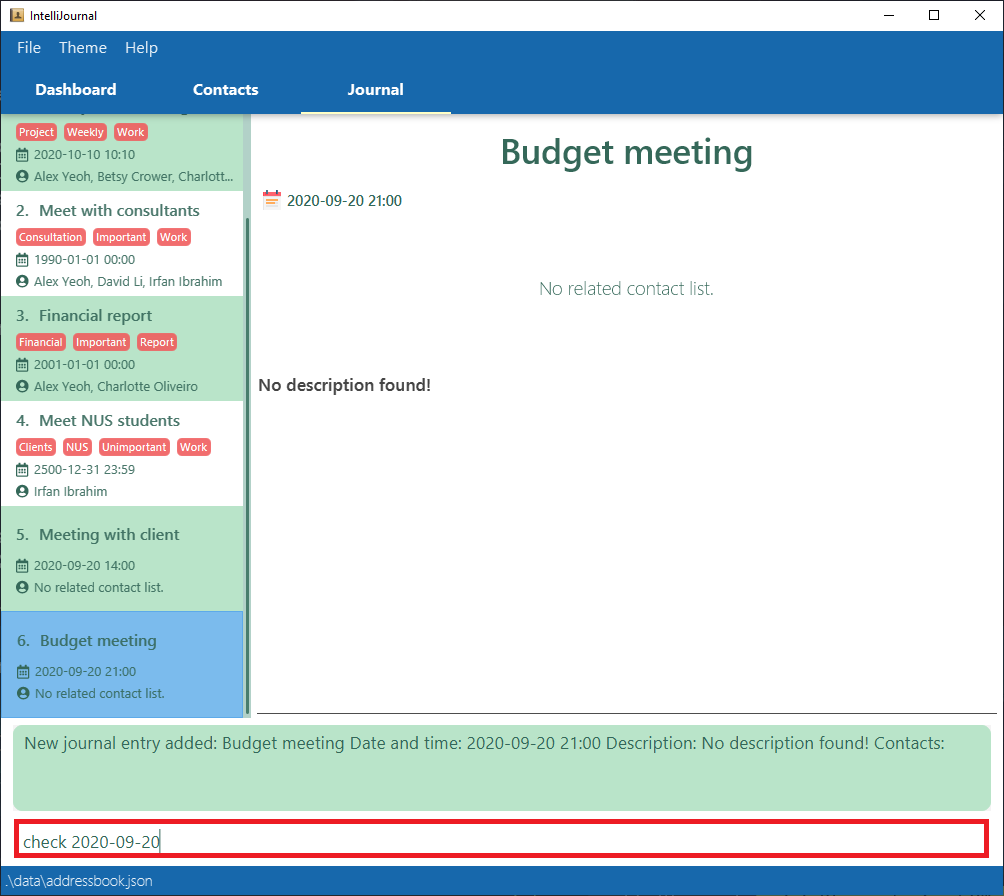
-
This finds a list of journal entries on the date 2020-09-20.
Example 2:
-
Type
checkinto the command box and press enter. This finds a list of journal entries on the current date.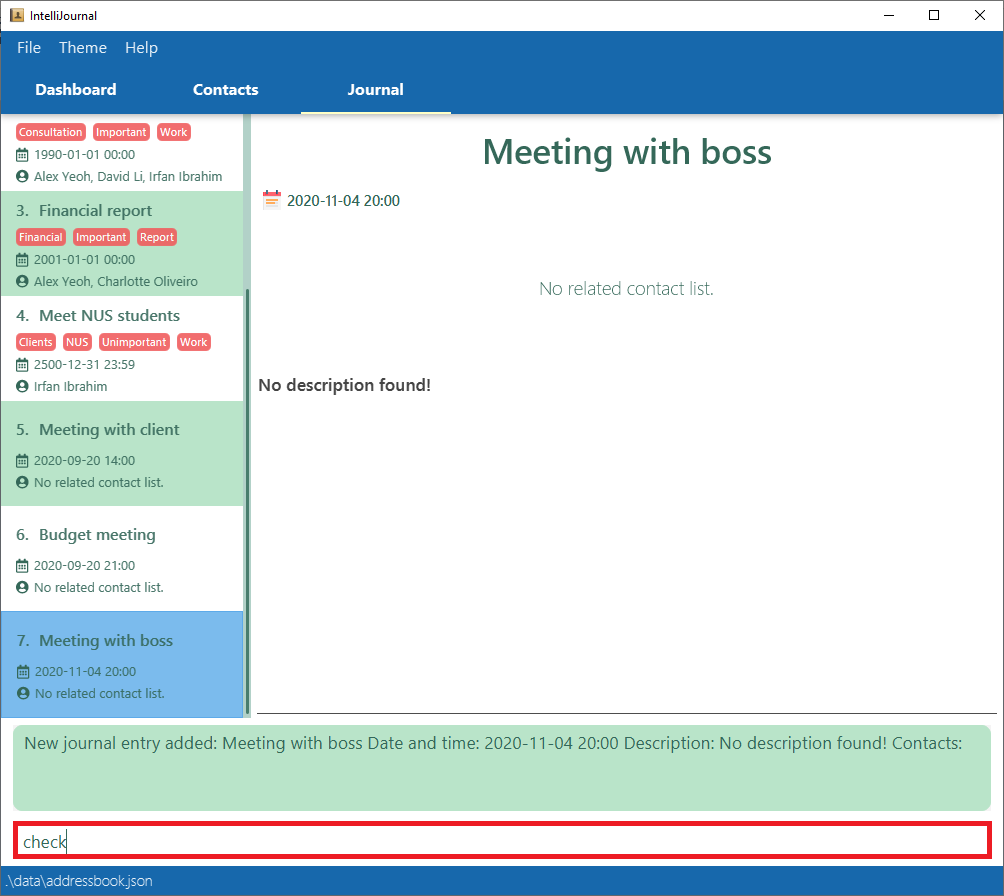
-
This finds a list of journal entries on the current date (2020-11-04 in the example).
Deleting a journal entry: deletej
Deletes a journal entry from the journal.
Aliases: deletej, delj
Format: deletej INDEX
-
INDEXrefers to the index number of the journal shown in the list.
Example:
-
Type
deletej 5into the command box and press enter.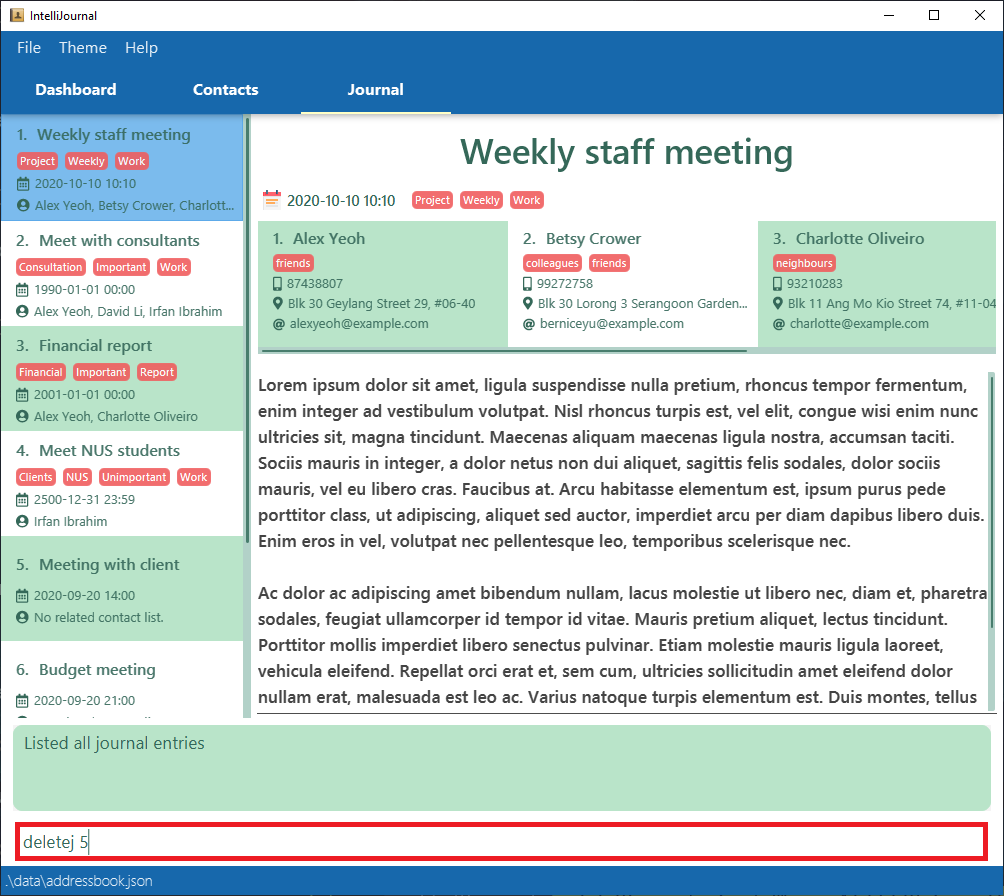
-
This deletes the 5th journal entry in the journal.
Clearing the journal: clearj
Clears all journal entries in the journal.
Aliases: clearj, cj
Format: clearj
Example:
-
Type
clearjinto the command box and press enter.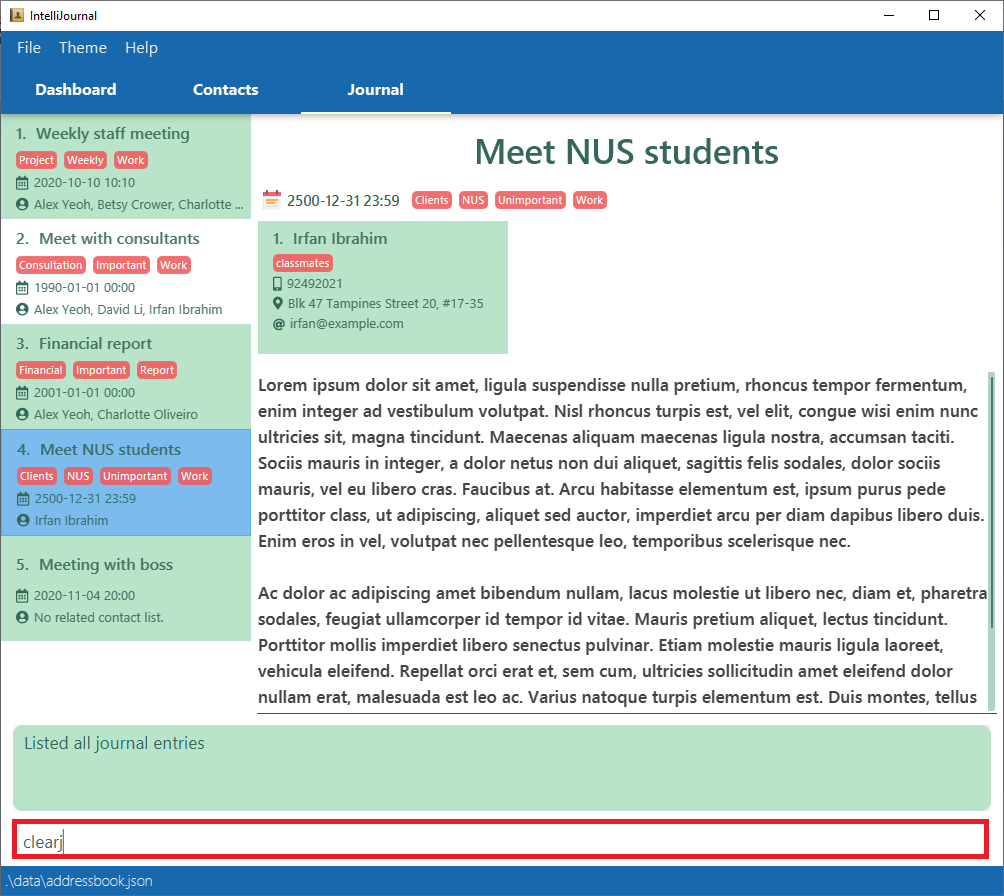
-
This removes all journal entries in the journal.
Miscellaneous
Viewing help menu: help
Gives the explanation and format of commands in the system and does not change the current displaying tab.
Aliases: help, h
Format: help [of/COMMAND]
- The
of/COMMANDargument supplied will indicate which command explanation to show. - If no
of/COMMANDargument is supplied, you will see a new window containing the link to our User Guide.
Example 1:
-
Type
help of/addcin the command box and press enter.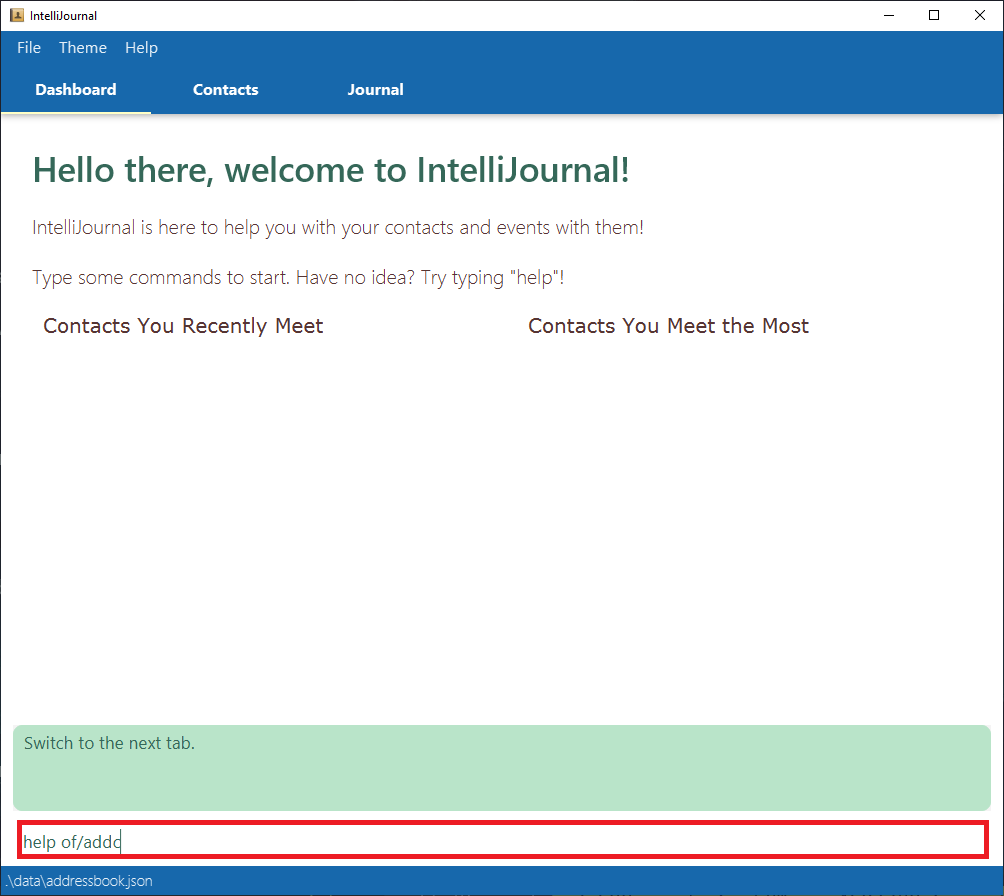
-
The information pane should give you information on how to use the
addccommand.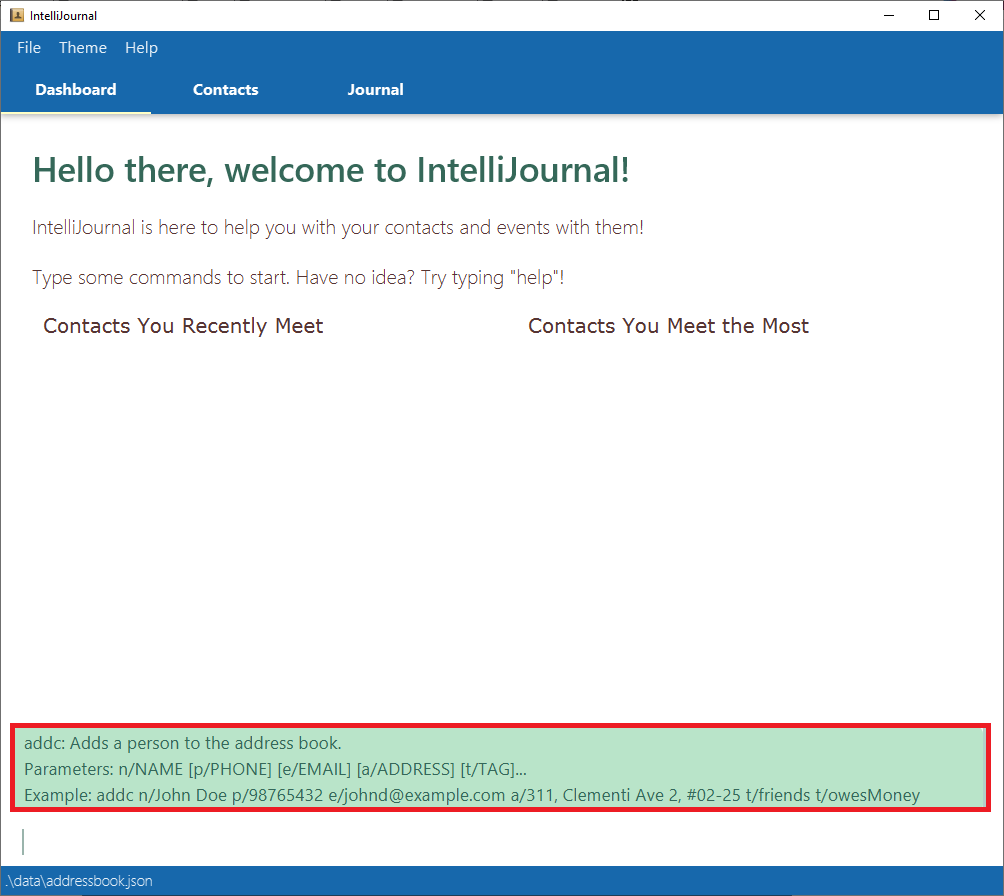
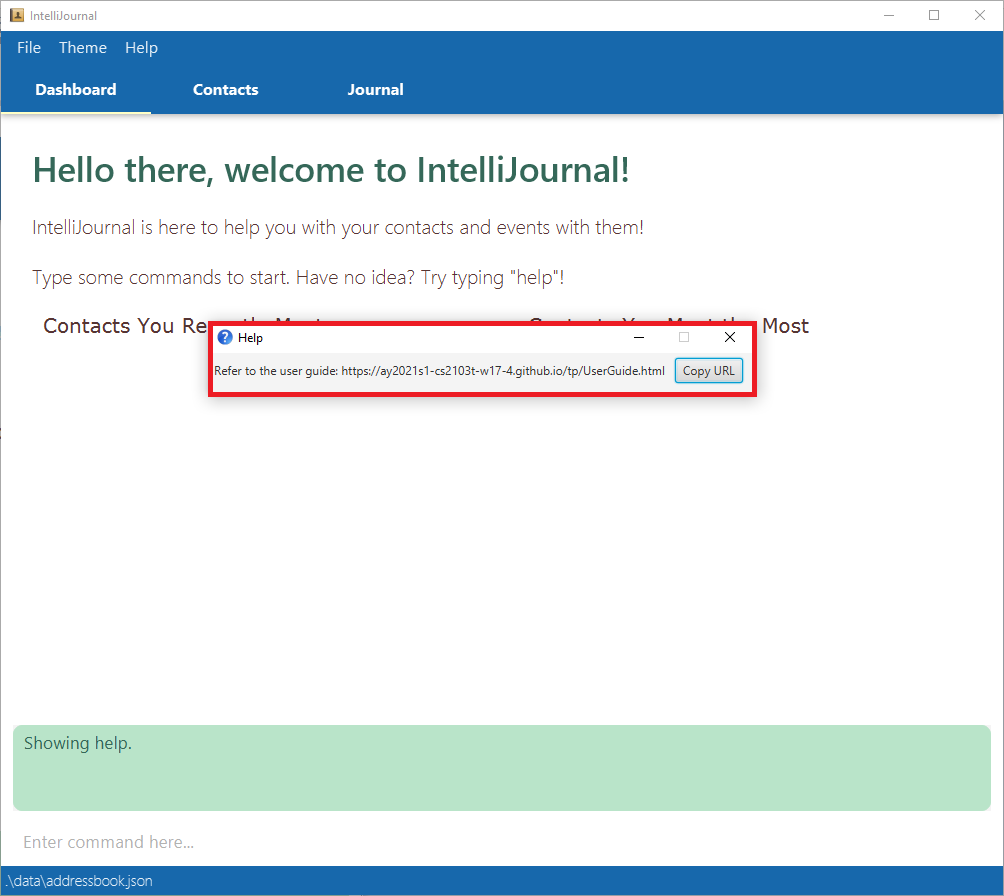
Example 2:
-
Type
helpin the command box and press enter.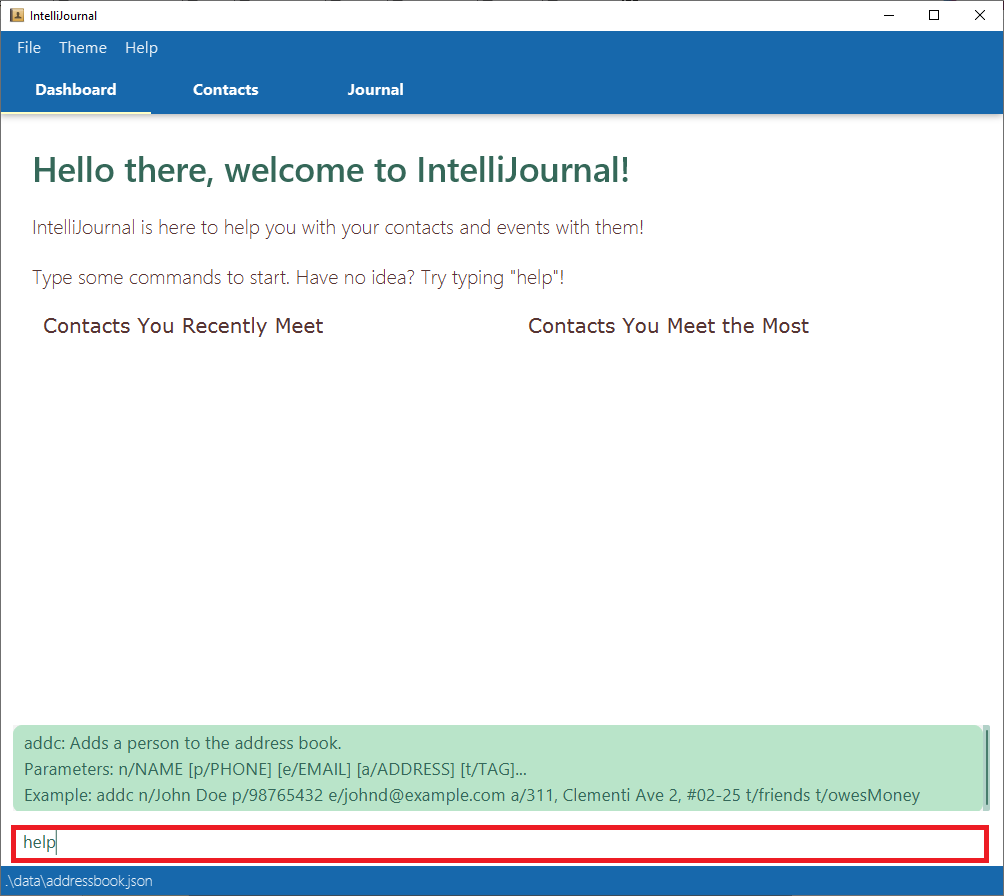
-
There should be a pop-up with a link to this user guide.
Switching the display tab: switch
Switches the current displaying tab to the other tab.
Aliases: switch, swt
Format: switch
Example:
-
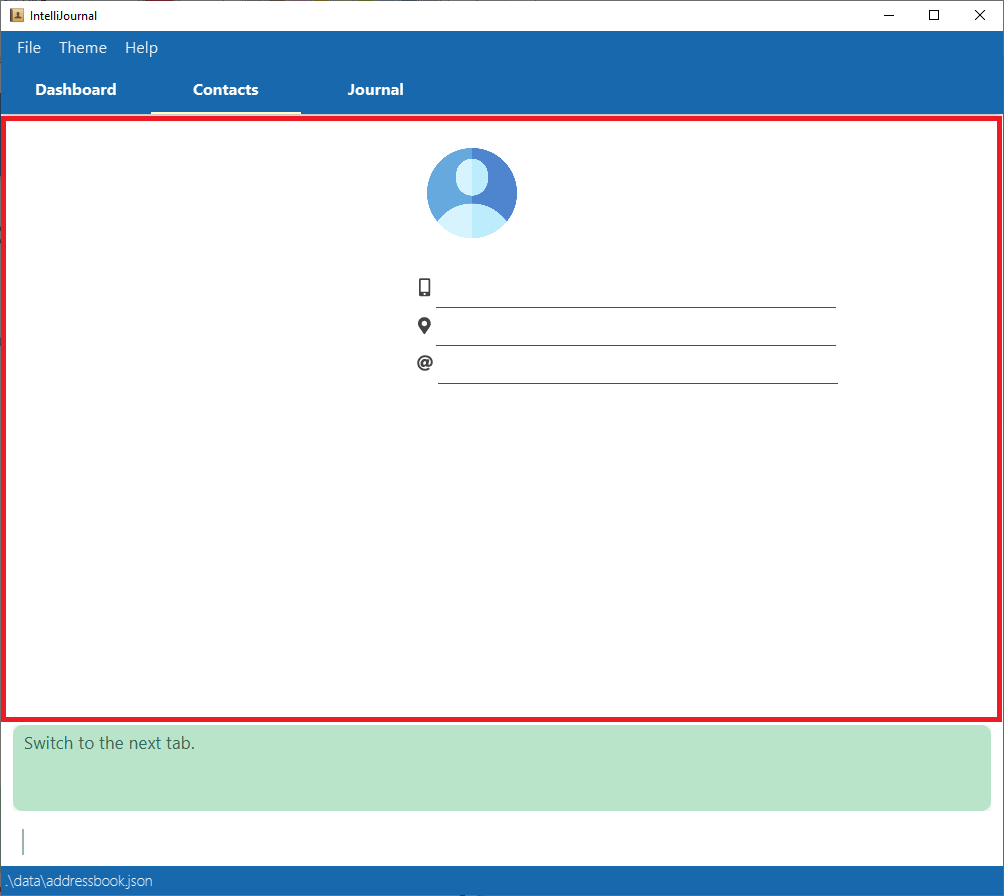
Type
switchin the command box and press enter.
-
This switches the display to the next tab.
Adding aliases for existing commands: alias
Adds your preferred shortcut for existing commands.
Aliases: alias, al
Format: alias TARGET ALIAS
-
TARGET: Existing command or alias in the IntelliJournal. -
ALIAS: The personalized shortcut you want to add into the system.
![]() Note:
Note:
- We have provided some default shortcuts which can be found in
Command Summary, you can use
aliascommand to add your personalized command alias. - You can add a shortcut according to existing shortcut. eg. If you have added
stas a shortcut forswitch, you can usealias st si. You will addsias a valid alias for switch as well. -
Warning: IntelliJournal will not be able to have a single alias for two
different commands.
Eg. Ifsthas been added to the system, it will confuse IntelliJournal if you ask it to addstas a valid alias forcheckor other command.
Example:
-
Type
alias switch stinto the command box and press enter.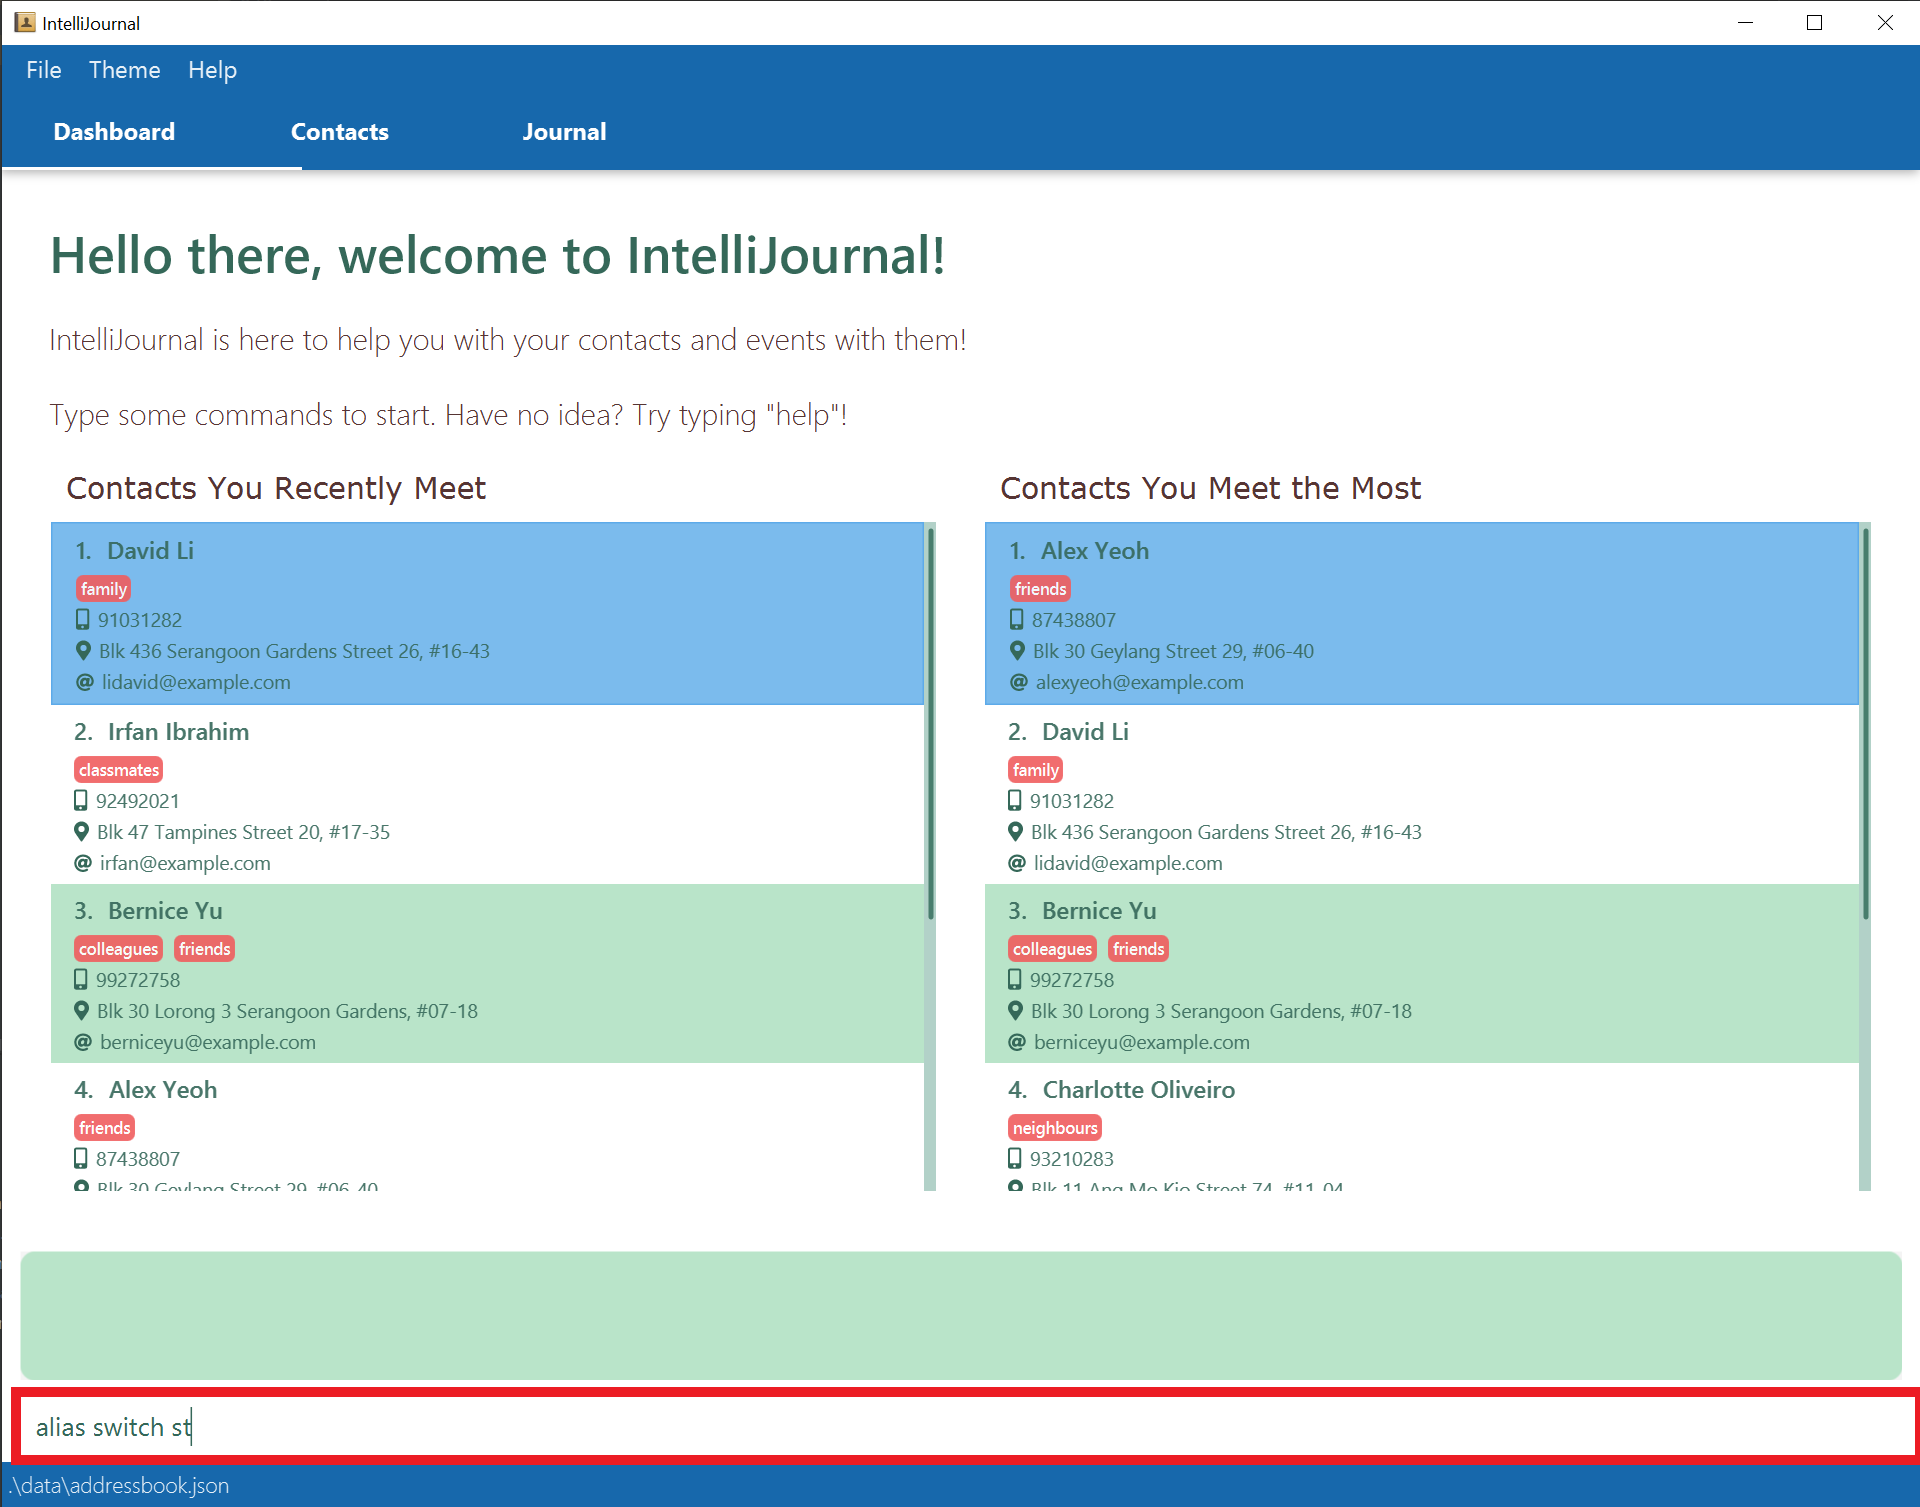
-
This adds
stas a valid shortcut forswitch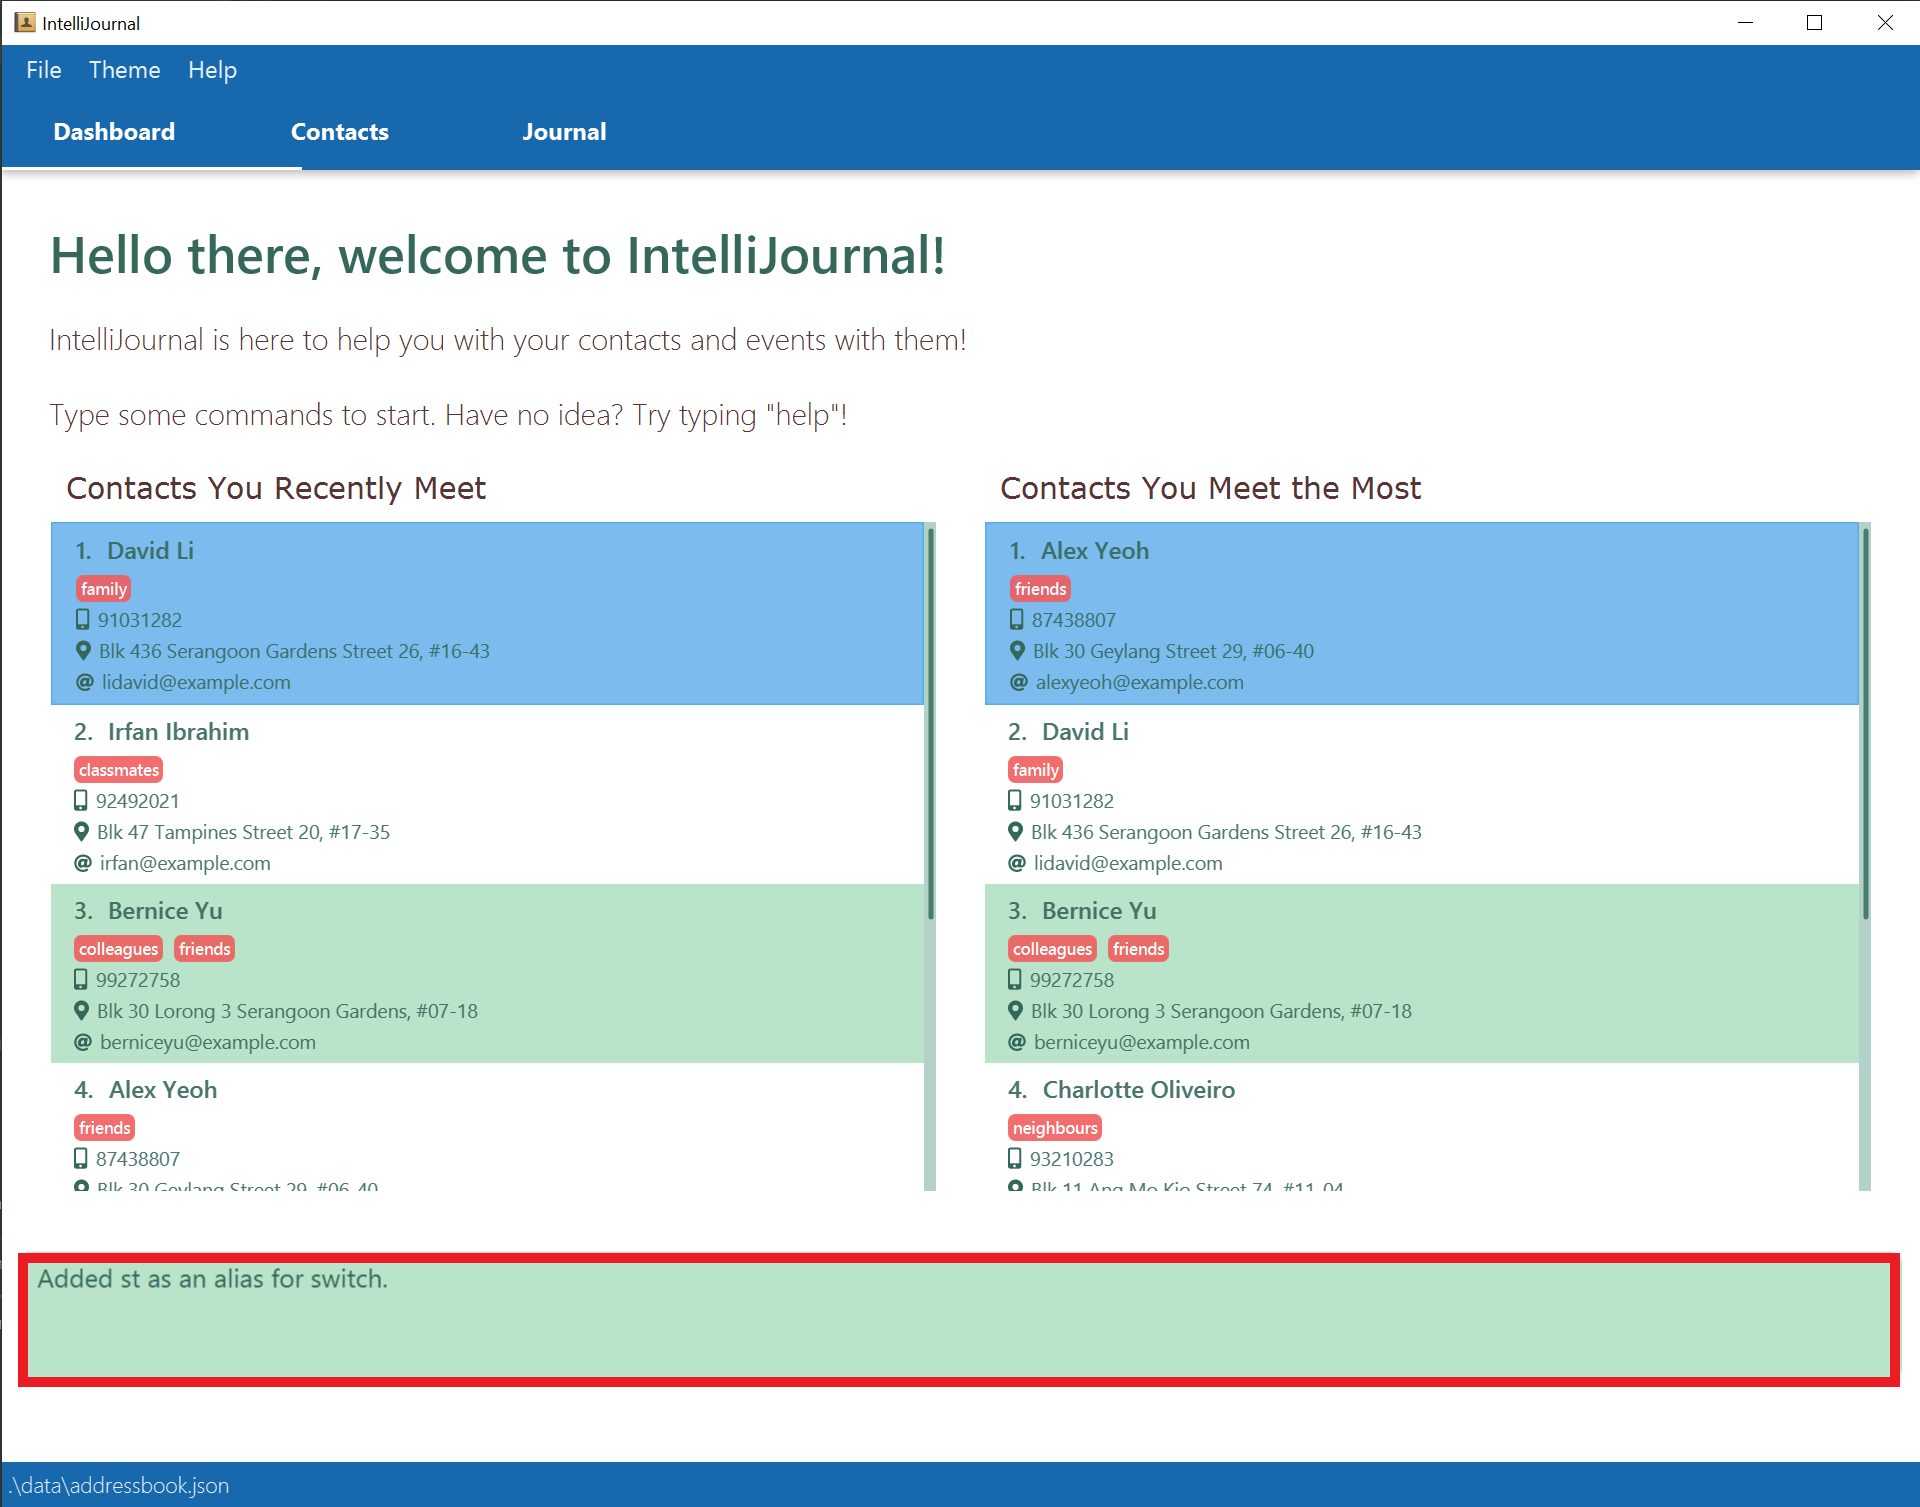
-
Then you can type
stinto the command box and press enter.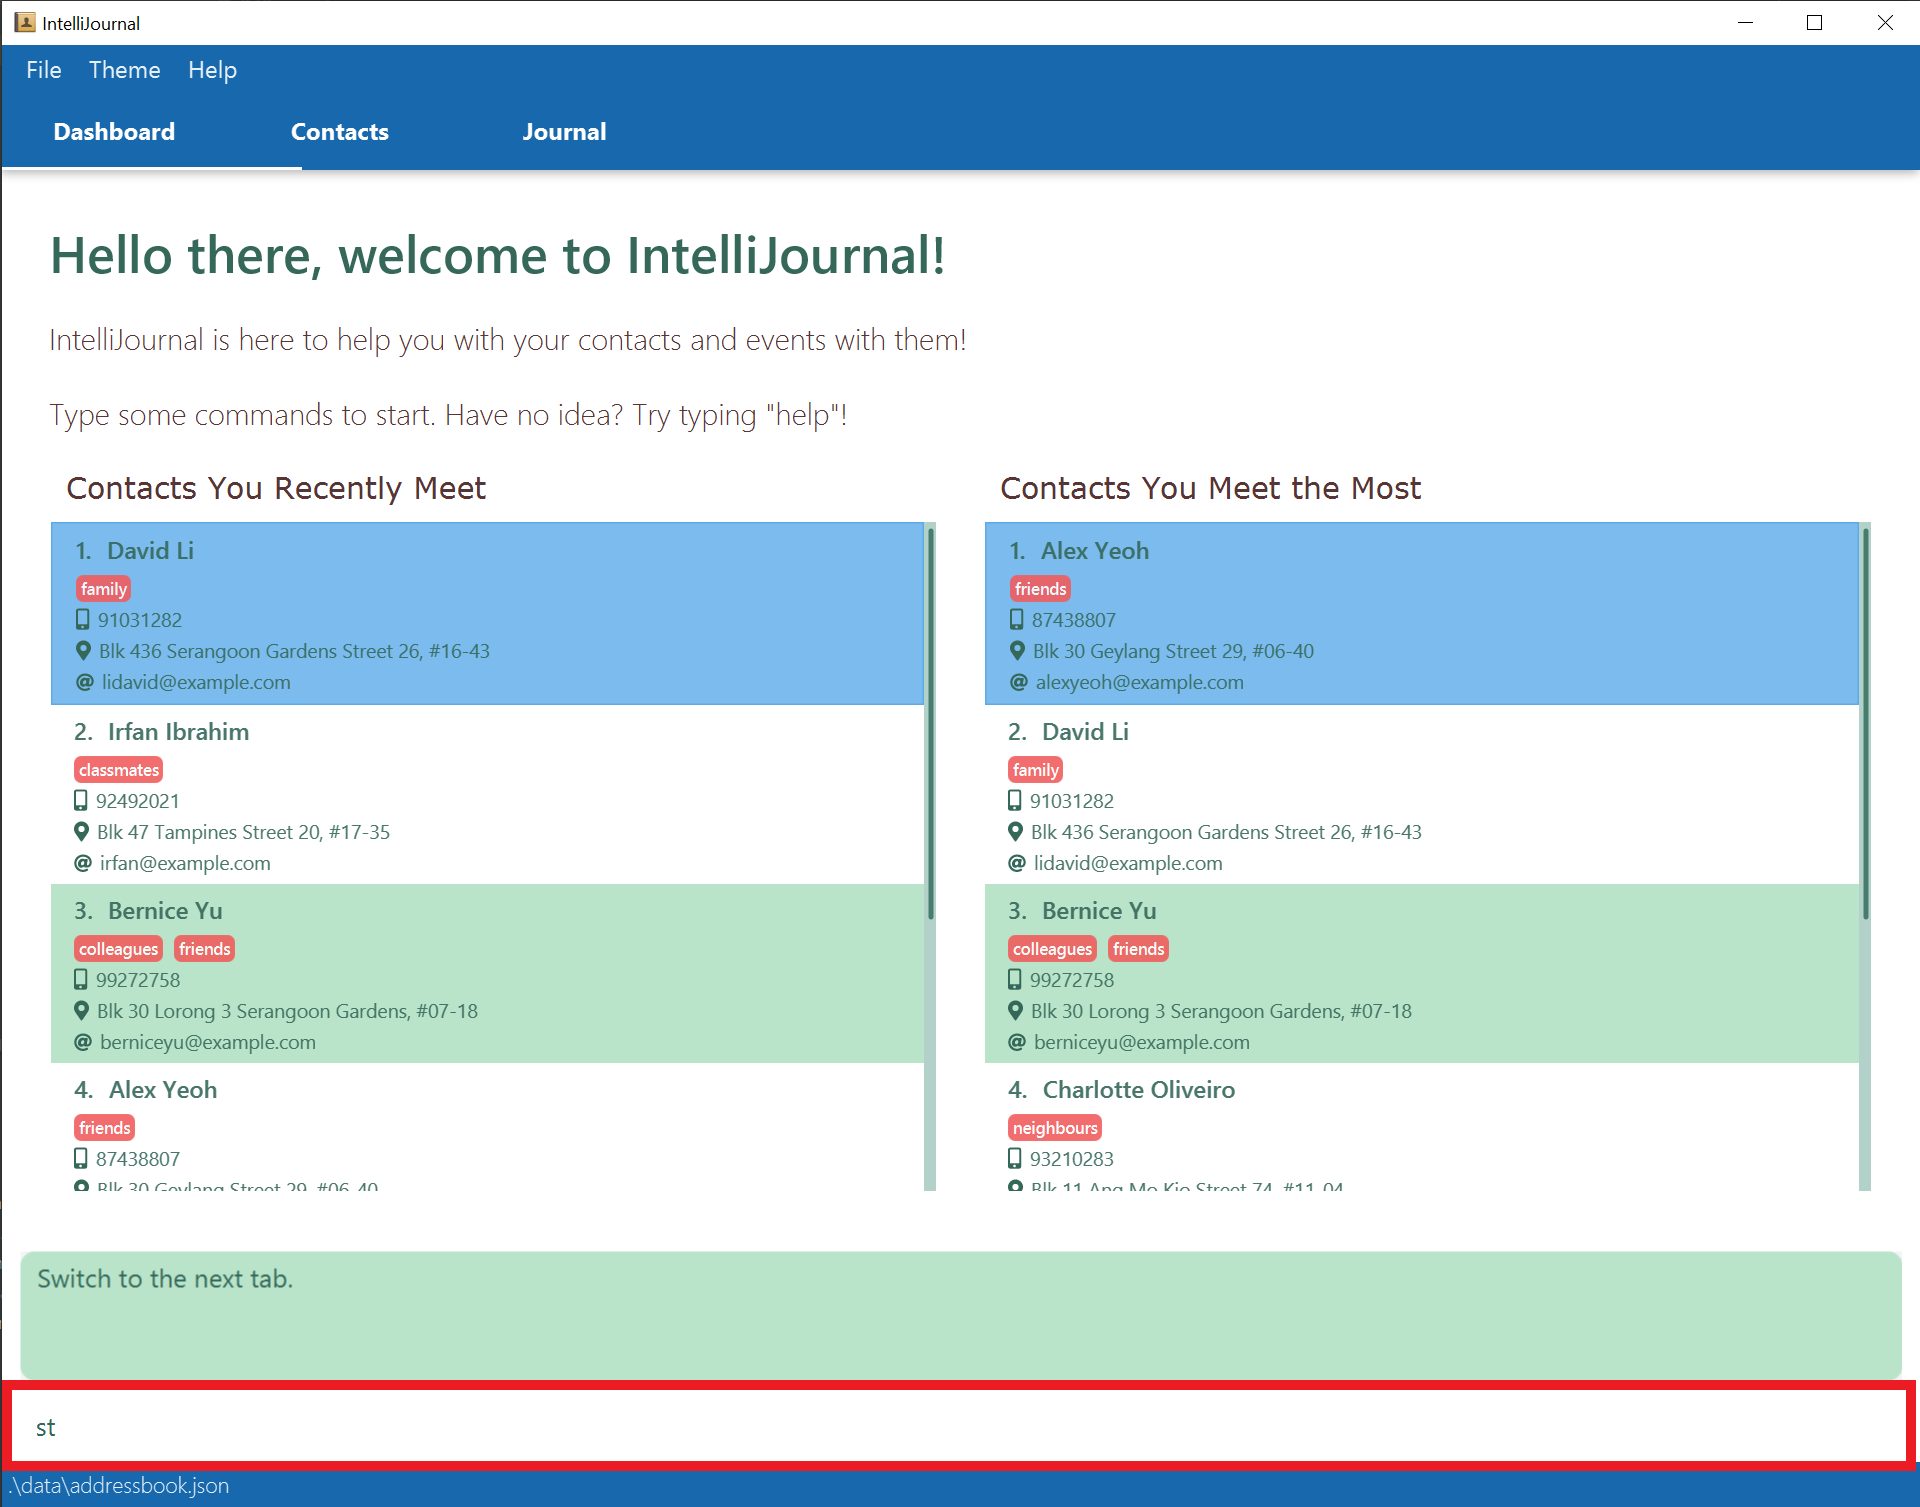
-
IntelliJournal will switch the tab which is what
switchcommand does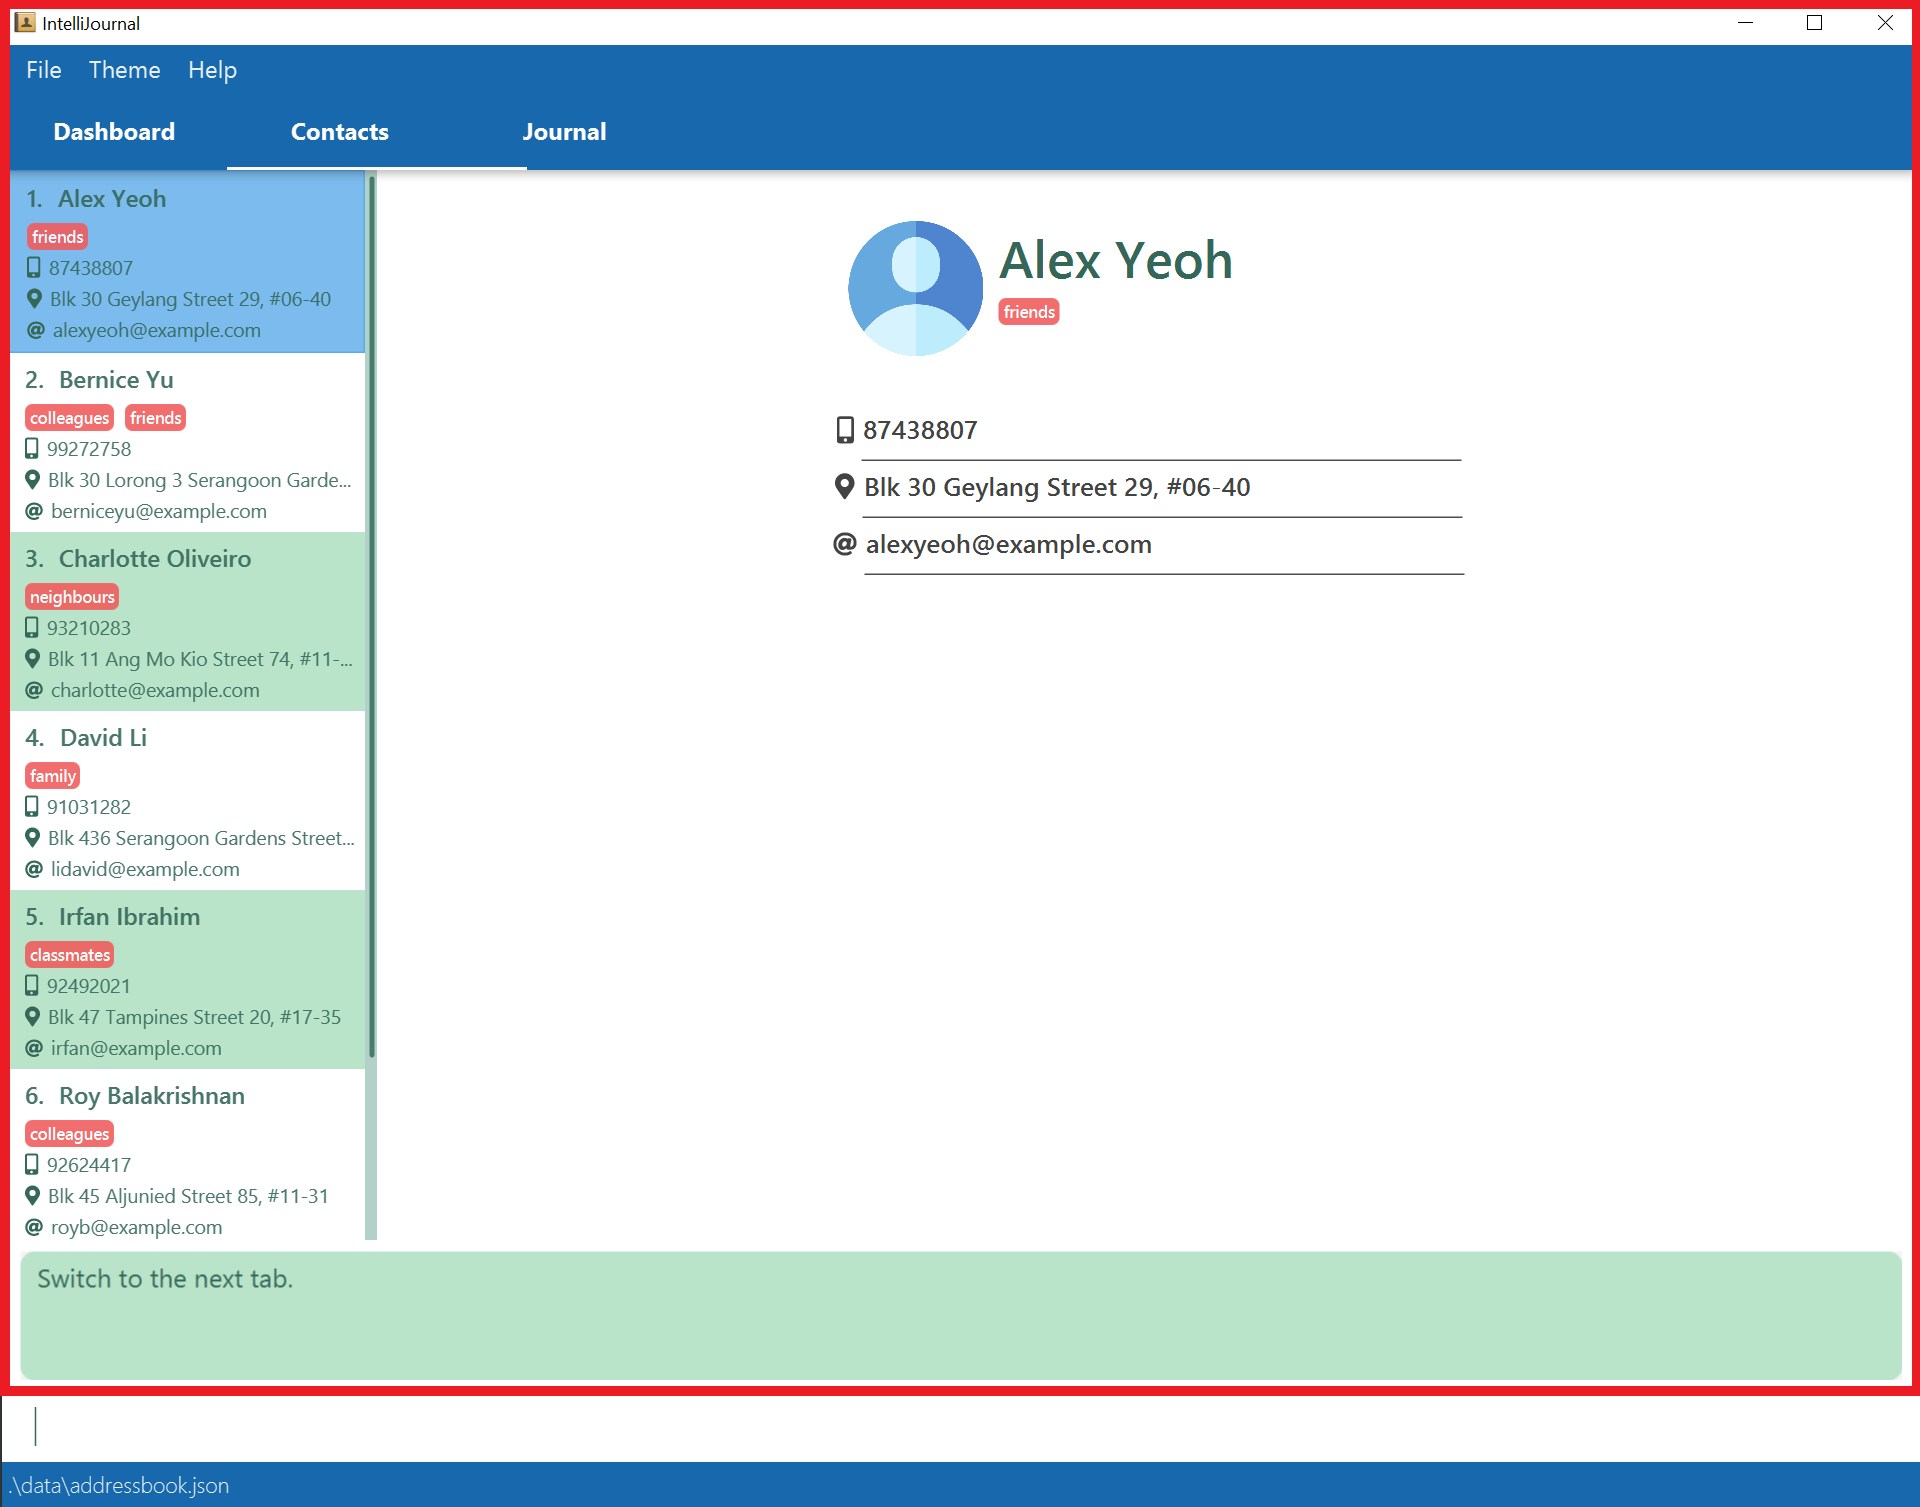
Deleting custom aliases: deletea
Removes the custom alias from IntelliJournal.
Aliases: deletea, dela
Format: deletea ALIAS
![]() Note:
Note:
- Default alias cannot be removed.
Example:
-
Assuming you have added
stas an alias forswitch, typedeletea stinto the command box and press enter.
-
This removes
stfrom IntelliJournal.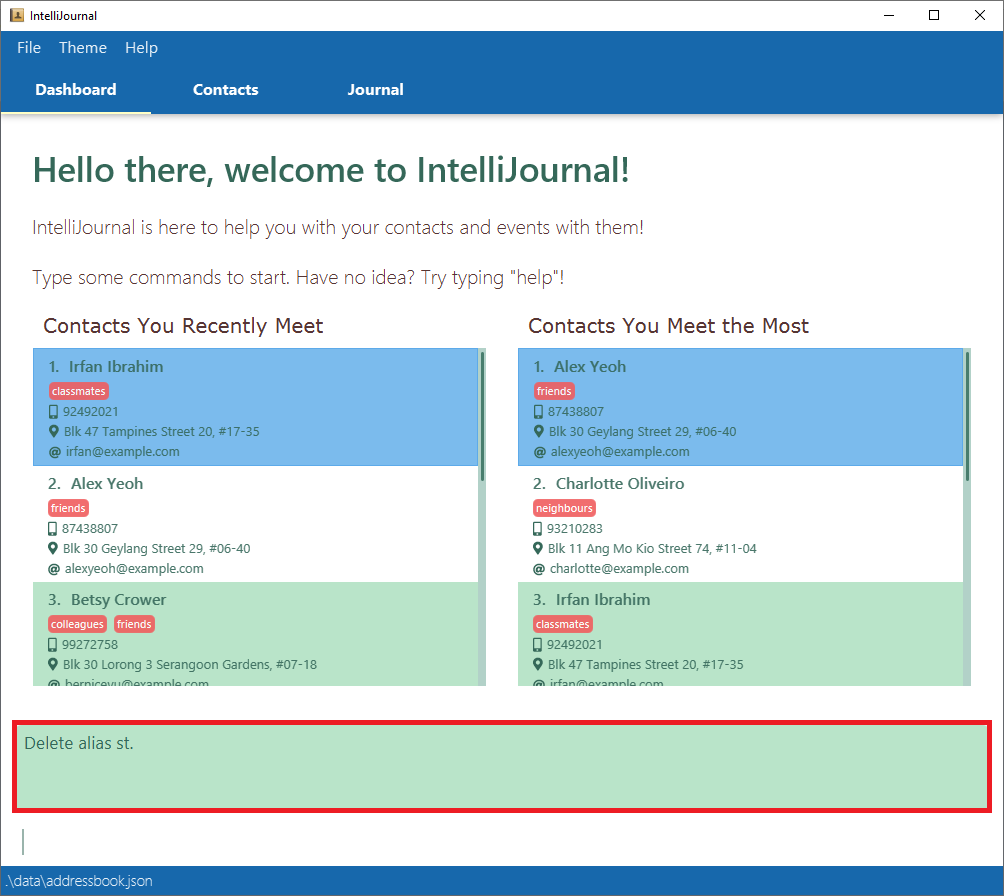
-
If you try to use
stagain, IntelliJournal will tell you that the command is not recognised.
Changing the main color theme: changetheme
You can use this command to choose between two main color scheme of IntelliJournal. One is dark theme and the other is bright theme mainly.
Aliases: changetheme, ctheme
Format: changetheme
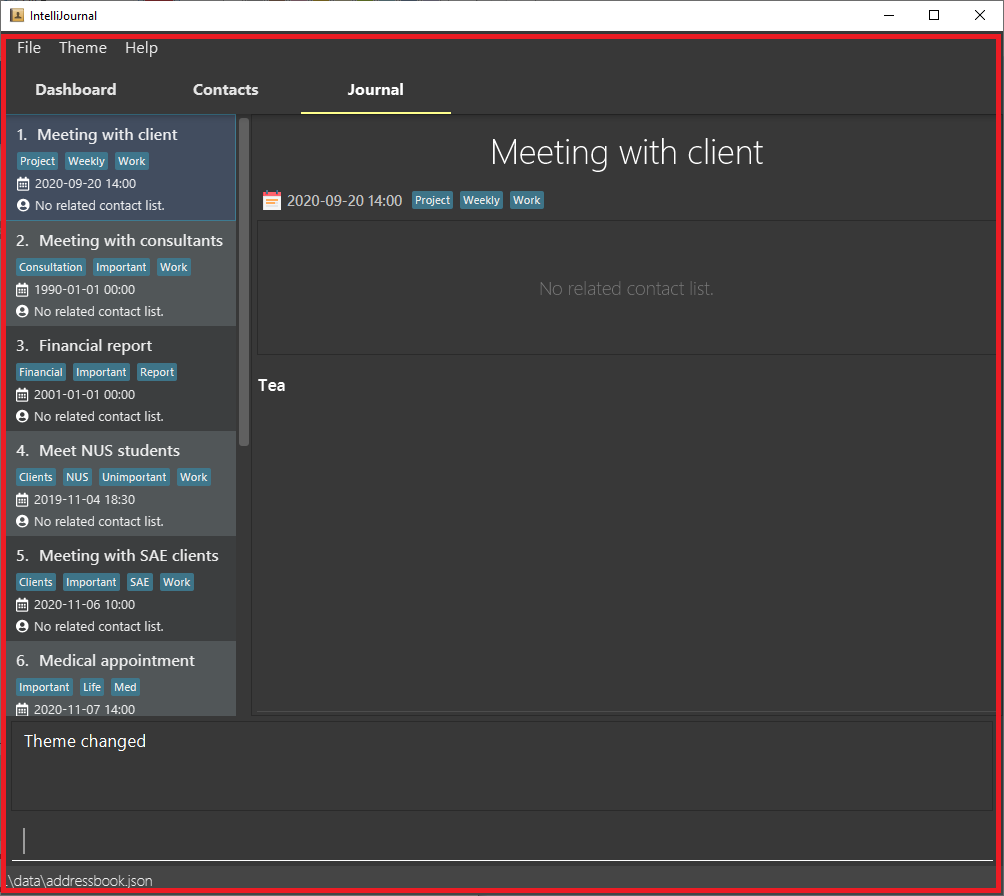
Example:
-
Type
changethemeinto the command box and press enter.
-
This changes the theme of IntelliJournal.
Exiting the program: exit
Exits the program.
Aliases: exit, quit, q
Format: exit
Example:
-
Type
exitinto the command box and press enter.
-
This exits out of IntelliJournal.
Saving the data
IntelliJournal data is saved in the hard disk automatically after any command that changes the data. There is no need to save manually.
FAQ
Q: How do I transfer my data to another Computer?
A: Install the app in the other computer and overwrite the empty data file
it creates with the file that contains the data of your previous
IntelliJournal home folder.
Command Summary
Contacts
| Command | Format |
|---|---|
| Adding a contact |
addcontact n/NAME [p/PHONE_NUMBER] [e/EMAIL] [a/ADDRESS]
[t/TAG]…
|
addc n/NAME [p/PHONE_NUMBER] [e/EMAIL] [a/ADDRESS] [t/TAG]…
|
|
| Listing all contacts | listc |
lc |
|
| Editing a contact |
editc INDEX [n/NAME] [p/PHONE_NUMBER] [e/EMAIL] [a/ADDRESS]
[t/TAG]…
|
edc INDEX [n/NAME] [p/PHONE_NUMBER] [e/EMAIL] [a/ADDRESS]
[t/TAG]…
|
|
| Viewing a contact | viewc INDEX |
vc INDEX |
|
| Finding contacts |
findc [n/NAME_KEYWORDS] [p/PHONE_KEYWORDS]
[e/EMAIL_KEYWORDS] [a/ADDRESS_KEYWORDS] [t/TAG]…
|
fc [n/NAME_KEYWORDS] [p/PHONE_KEYWORDS]
[e/EMAIL_KEYWORDS] [a/ADDRESS_KEYWORDS] [t/TAG]…
|
|
| Deleting a contact | deletec INDEX |
delc INDEX |
|
| Clearing the address book | clearc |
cc |
Journal Entries
| Command | Format |
|---|---|
| Adding a journal entry |
addjournal n/TITLE [at/DATE_AND_TIME] [d/DESCRIPTION]
[with/CONTACT_NAME]… [t/TAG]…
|
addj n/TITLE [at/DATE_AND_TIME] [d/DESCRIPTION]
[with/CONTACT_NAME]… [t/TAG]…
|
|
adde n/TITLE [at/DATE_AND_TIME] [d/DESCRIPTION]
[with/CONTACT_NAME]… [t/TAG]…
|
|
| Listing all journal entries | listj |
lj |
|
| Editing a journal entry |
editj INDEX [n/TITLE] [at/DATE_AND_TIME] [d/DESCRIPTION]
[with/CONTACT_NAME]… [t/TAG]…
|
edj INDEX [n/TITLE] [at/DATE_AND_TIME] [d/DESCRIPTION]
[with/CONTACT_NAME]… [t/TAG]…
|
|
| Viewing a journal entry | viewj INDEX |
vj INDEX |
|
| Finding journal entries |
findj [n/TITLE_KEYWORDS] [at/DATE_AND_TIME]
[with/CONTACT_NAME_KEYWORDS]… [d/DESCRIPTION_KEYWORDS]
[t/TAG]…
|
fj [n/TITLE_KEYWORDS] [at/DATE_AND_TIME]
[with/CONTACT_NAME_KEYWORDS]… [d/DESCRIPTION_KEYWORDS]
[t/TAG]…
|
|
| Checking schedule | check [DATE] |
ck [DATE] |
|
| Deleting a journal entry | deletej INDEX |
delj INDEX |
|
| Clearing the journal | clearj |
cj |
Miscellaneous
| Command | Format |
|---|---|
| Viewing help menu | help [COMMAND] |
h [COMMAND] |
|
| Switching the display tab | switch |
swt |
|
| Adding aliases for existing commands | alias TARGET ALIAS |
al TARGET ALIAS |
|
| Deleting custom aliases | deletea ALIAS |
dela ALIAS |
|
| Changing the color theme | changetheme |
ctheme |
|
| Exiting the program | exit |
quit |
|
q |